Overview
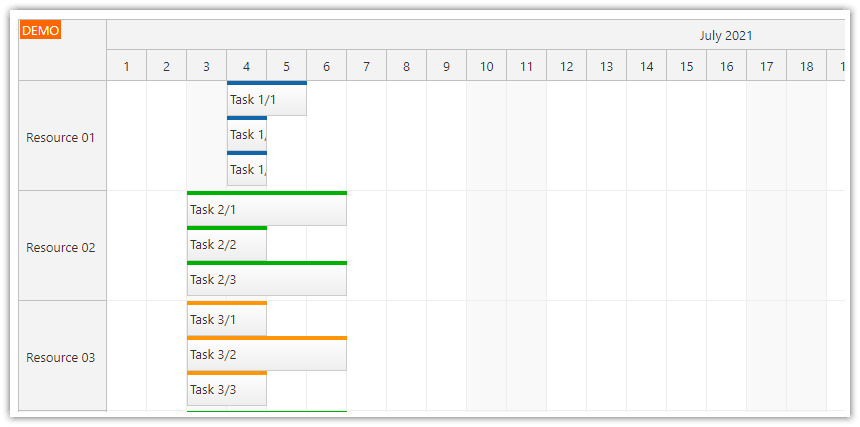
Since version 2023.1.5515, the JavaScript Scheduler component can set a maximum number of lines within a row that will be used for displaying concurrent events.
By default, the Scheduler expands the height of the row to match the maximum number of concurrent events - all events are always visible.
In this tutorial, you will see how to display a maximum number of lines within a row. Extra concurrent events will be indicated using an arrow icon displayed in each grid cell.
You can use the icon to display the full details of the cell (in a separate view) or to expand the row to display all concurrent events.
To learn more about arranging concurrent events in Scheduler rows, please see the JavaScript Scheduler event placement strategies tutorial.
The downloadable project includes a trial version of DayPilot Pro for JavaScript (see License below).
License
Licensed for testing and evaluation purposes. Please see the license agreement included in the sample project. You can use the source code of the tutorial if you are a licensed user of DayPilot Pro for JavaScript. Buy a license.
How to Set Maximum Number of Overlapping Events
To define the maximum number of concurrent events, you can use the maxLines property of the resource data object.
Please note that it affects the number of lines within a row (as the name suggests) and not the number of events per cell. Events can span multiple cells and there can be situations where the first lines are empty and there are events in higher lines only.
This example sets a maximum number of lines to 1 for the “Resource 2”:
const resources = [
  {name: "Resource 1", id: "R1"},
  {name: "Resource 2", id: "R2", maxLines: 1},
  {name: "Resource 3", id: "R3"},
  {name: "Resource 4", id: "R4"},
  {name: "Resource 5", id: "R5"},
  {name: "Resource 6", id: "R6"},
  {name: "Resource 7", id: "R7"},
  {name: "Resource 8", id: "R8"},
  {name: "Resource 9", id: "R9"},
];
“Expand” Icon
![]()
In this step, we will add an icon that indicates hidden events. We add the icon to the bottom of a grid cell as a cell active area.
First, we need to make space for the icon at the bottom of the row:
const resources = [
  {name: "Resource 1", id: "R1"},
  {name: "Resource 2", id: "R2", maxLines: 1, marginBottom: 20},
  {name: "Resource 3", id: "R3"},
  {name: "Resource 4", id: "R4"},
  {name: "Resource 5", id: "R5"},
  {name: "Resource 6", id: "R6"},
  {name: "Resource 7", id: "R7"},
  {name: "Resource 8", id: "R8"},
  {name: "Resource 9", id: "R9"},
];
Now we can use the onBeforeCellRender event to display the icon.
onBeforeCellRender: args => {
  const row = args.cell.row;
  if (row.data.maxLines) {
    const events = row.events.forRange(args.cell.start, args.cell.end);
    if (events.length > row.data.maxLines) {
      args.cell.areas = [
        {
          bottom: 0,
          left: 0,
          right: 0,
          height: 20,
          action: "None",
          horizontalAlignment: "center",
          symbol: "icons/daypilot.svg#minichevron-down-4",
          style: "cursor:pointer",
          fontColor: "#f37021",
          onClick: args => {
            row.data.maxLines = null;
            row.data.marginBottom = null;
            dp.update();
          }
        }
      ];
    }
  }
}
First, we check the row data object to see if maxLines value is specified:
const row = args.cell.row;
if (row.data.maxLines) {
We get a list of events for the current cell using row.events.forRange() method:
const events = row.events.forRange(args.cell.start, args.cell.end);If the number of events is higher than the maximum number of lines, we add the active area.
In the onClick event handler of the active area, we reset the maxLines value and update the row.
onClick: args => {
  row.data.maxLines = null;
  row.data.marginBottom = null;
  dp.update();
}
The This will activate the default mode where the row height is adjusted to display all events":

results of the onBeforeCellRender event handler are cached. In this case, the content depends on the number of events so we need to disable the caching. When the caching is disabled, the values will be recalculated on every change.
const resources = [
  {name: "Resource 1", id: "R1"},
  {name: "Resource 2", id: "R2", maxLines: 1, marginBottom: 20, cellsAutoUpdated: true},
  {name: "Resource 3", id: "R3"},
  {name: "Resource 4", id: "R4"},
  {name: "Resource 5", id: "R5"},
  {name: "Resource 6", id: "R6"},
  {name: "Resource 7", id: "R7"},
  {name: "Resource 8", id: "R8"},
  {name: "Resource 9", id: "R9"},
];
You can also turn off the cache globally using beforeCellRenderCaching property:
const dp = new DayPilot.Scheduler("dp", {
  beforeCellRenderCaching: false,
  // ...
});
dp.init(); DayPilot


