Overview
How to configure the Scheduler component to display task priority.
Group tasks with the same priority and display them in dedicated sub-rows of the assigned resource.
Optionally, hide the priority names in the row header while keeping the split-resource layout.
The attached project includes a trial version of DayPilot Pro for JavaScript (see License below).
License
Licensed for testing and evaluation purposes. Please see the license agreement included in the sample project. You can use the source code of the tutorial if you are a licensed user of DayPilot Pro for JavaScript. Buy a license.
Displaying Concurrent Tasks with Different Priorities in the JavaScript Scheduler
Let’s start with a list of resources that will be displayed as rows in the JavaScript Scheduler component:
const resources = [
  { name: "Resource 1", id: "R1" },
  { name: "Resource 2", id: "R2" },
  { name: "Resource 3", id: "R3" },
  { name: "Resource 4", id: "R4" },
  { name: "Resource 5", id: "R5" },
  { name: "Resource 6", id: "R6" },
  { name: "Resource 7", id: "R7" },
  { name: "Resource 8", id: "R8" },
  { name: "Resource 9", id: "R9" },
];
If you have multiple overlapping tasks with different priorities assigned to the same resource, they will be arranged in the appropriate row using the default event sorting rule (which is start asc, end desc).
const firstDay = DayPilot.Date.today().firstDayOfMonth();
const events = [
  { id: 1, text: "Task 1", start: firstDay.addDays(3), end: firstDay.addDays(9), resource: "R1", priority: 1 },
  { id: 2, text: "Task 2", start: firstDay.addDays(2), end: firstDay.addDays(8), resource: "R1", priority: 2 },
  { id: 3, text: "Task 3", start: firstDay.addDays(1), end: firstDay.addDays(7), resource: "R1", priority: 3 },
  { id: 4, text: "Task 4", start: firstDay.addDays(10), end: firstDay.addDays(13), resource: "R1", priority: 1 },
];
To make the priority of each task clearly visible, we will set the background color accordingly and display the priority number in an active area on the right side of the task.
This can be done using the onBeforeEventRender event handler:
onBeforeEventRender: (args) => {
  const event = args.data;
  const priority = event.priority;

  switch (priority) {
    case 1:
      event.backColor = "#e19e92";
      break;
    case 2:
      event.backColor = "#f6b26b";
      break;
    case 3:
      event.backColor = "#93c47d";
      break;
    default:
      event.backColor = "#555555";
  }

  event.borderColor = "darker";
  event.fontColor = "#333";
  event.areas = [
    {
      right: 5,
      top: 5,
      width: 25,
      height: 25,
      text: priority,
      style: "text-align: center; line-height: 25px;",
      backColor: "#ffffff88",
      fontColor: "#333",
      borderRadius: "50%",
    },
  ];
},
The sample keeps the priority directly on each event. The create and move handlers update that property when the user creates a new task or moves an existing one to a different split row.
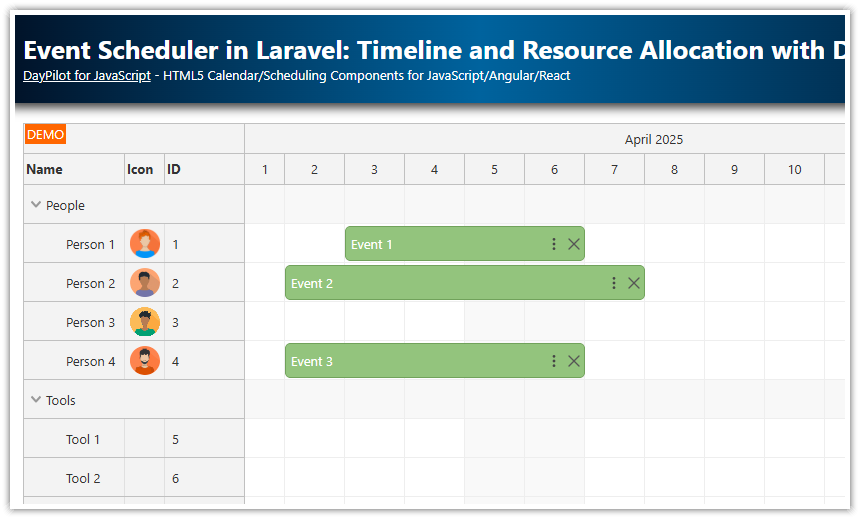
The default configuration of the Scheduler may result in a view where tasks with the same priority are displayed at different positions within a row:

There are a couple of event arrangement strategies available that may help (such as forcing a specific line within a row for each event or using virtual containers), but we will take a look at another option, which is to define a dedicated sub-row for each priority level.
Defining Sub-Rows for Task Priorities in the Scheduler UI
We will split each resource into three sub-rows, one for each priority level.
In this example, we use a static array with predefined resources. If you load your resources from the server side, you can pre-process the array before loading it into the Scheduler component, just as we do below.
const resources = [
  { name: "Resource 1", id: "R1" },
  { name: "Resource 2", id: "R2" },
  { name: "Resource 3", id: "R3" },
  { name: "Resource 4", id: "R4" },
  { name: "Resource 5", id: "R5" },
  { name: "Resource 6", id: "R6" },
  { name: "Resource 7", id: "R7" },
  { name: "Resource 8", id: "R8" },
  { name: "Resource 9", id: "R9" },
];

resources.forEach((resource) => {
  resource.split = [
    { name: "Priority 1", id: resource.id + ".1", priority: 1 },
    { name: "Priority 2", id: resource.id + ".2", priority: 2 },
    { name: "Priority 3", id: resource.id + ".3", priority: 3 },
  ];
});
Now we will define row header columns where the first column displays the parent resource name and the second column displays the priority. Adding the split property to the column definition ensures that this column will display data for the sub-resource.
const dp = new DayPilot.Scheduler("dp", {
  rowHeaderColumns: [
    { name: "Resource", display: "name" },
    { name: "Priority", display: "name", split: true },
  ],
  // ...
});
We also need to modify our task data so that the resource field points to the matching split row. For example, resource "R1" in a task with priority 1 becomes "R1.1". In the sample, this stays inline so you can see the exact value that is assigned.
const events = [
  { id: 1, text: "Task 1", start: firstDay.addDays(3), end: firstDay.addDays(9), resource: "R1", priority: 1 },
  { id: 2, text: "Task 2", start: firstDay.addDays(2), end: firstDay.addDays(8), resource: "R1", priority: 2 },
  { id: 3, text: "Task 3", start: firstDay.addDays(1), end: firstDay.addDays(7), resource: "R1", priority: 3 },
  { id: 4, text: "Task 4", start: firstDay.addDays(10), end: firstDay.addDays(13), resource: "R1", priority: 1 },
];

events.forEach((event) => {
  event.resource = event.resource + "." + event.priority;
});
The same direct assignment is used later in the create and move handlers so the resource and priority fields stay synchronized.
This setup ensures that tasks with the same priority are always displayed at the same position. You can even have multiple overlapping tasks with the same priority, and the Scheduler will sort them inside the dedicated sub-row using the default rule.

Hide the Priority from the Row Header
It is also possible to keep just the resource name in the row header (without showing the dedicated priority column). In the sample project, the checkbox simply hides the second column at runtime:
this.elements.showPriority.addEventListener("change", () => {
  dp.rowHeaderColumns[1].hidden = !this.elements.showPriority.checked;
  dp.update();
});
If you do not need the toggle, you can remove the second row-header column completely and keep the more compact Scheduler view as the default.

Full Source Code
Here is the full source code of our Scheduler configuration that defines a dedicated sub-resource for each priority level so that tasks with the same priority can be displayed at the same position:
<!DOCTYPE html>
<html>
<head>
  <meta charset="utf-8"/>
  <meta name="viewport" content="width=device-width, initial-scale=1">
  <title>JavaScript Scheduler: Using Split Resources to Manage Task Priorities</title>

  <style type="text/css">
    p, body, td, input, select, button { font-family: -apple-system,system-ui,BlinkMacSystemFont,'Segoe UI',Roboto,'Helvetica Neue',Arial,sans-serif; font-size: 14px; }
    body { padding: 0; margin: 0; background-color: #ffffff; }
    a { color: #1155a3; }
    .header { background: #003267; background: linear-gradient(to right, #011329 0%, #00639e 44%, #011329 100%); padding: 20px 10px; color: white; box-shadow: 0 0 10px 5px rgba(0, 0, 0, 0.75); }
    .header a { color: white; }
    .header h1 a { text-decoration: none; }
    .header h1 { padding: 0; margin: 0; }
    .main { padding: 18px 10px 24px; }
    .toolbar { display: inline-flex; align-items: center; gap: 8px; padding: 10px 14px; margin-bottom: 16px; border: 1px solid #d6dce5; border-radius: 8px; background: #f6f8fb; color: #334155; }
    .toolbar input { margin: 0; }
    .generated { color: #7a8da0; margin-top: 14px; text-align: right; }
    .generated a { color: inherit; }
  </style>

  <script src="js/daypilot/daypilot-all.min.js"></script>
</head>
<body>
<div class="header">
  <h1><a href="https://code.daypilot.org/46527/javascript-scheduler-priorities-using-split-resources">JavaScript Scheduler: Using Split Resources to Manage Task Priorities</a></h1>
  <div><a href="https://javascript.daypilot.org/">DayPilot for JavaScript</a> - HTML5 Calendar/Scheduling Components for JavaScript/Angular/React/Vue</div>
</div>

<div class="main">
  <label class="toolbar" for="show-priority">
    <input type="checkbox" id="show-priority" checked>
    <span>Show priorities in row headers</span>
  </label>

  <div id="dp"></div>
  <div class="generated">Generated using <a href="https://builder.daypilot.org/">DayPilot UI Builder</a>.</div>
</div>

<script>
  const app = {
    elements: {
      showPriority: document.getElementById("show-priority"),
    },
    loadData() {
      const resources = [
        { name: "Resource 1", id: "R1" },
        { name: "Resource 2", id: "R2" },
        { name: "Resource 3", id: "R3" },
        { name: "Resource 4", id: "R4" },
        { name: "Resource 5", id: "R5" },
        { name: "Resource 6", id: "R6" },
        { name: "Resource 7", id: "R7" },
        { name: "Resource 8", id: "R8" },
        { name: "Resource 9", id: "R9" },
      ];

      resources.forEach((resource) => {
        resource.split = [
          { name: "Priority 1", id: resource.id + ".1", priority: 1 },
          { name: "Priority 2", id: resource.id + ".2", priority: 2 },
          { name: "Priority 3", id: resource.id + ".3", priority: 3 },
        ];
      });

      const firstDay = DayPilot.Date.today().firstDayOfMonth();
      const events = [
        { id: 1, text: "Task 1", start: firstDay.addDays(3), end: firstDay.addDays(9), resource: "R1", priority: 1 },
        { id: 2, text: "Task 2", start: firstDay.addDays(2), end: firstDay.addDays(8), resource: "R1", priority: 2 },
        { id: 3, text: "Task 3", start: firstDay.addDays(1), end: firstDay.addDays(7), resource: "R1", priority: 3 },
        { id: 4, text: "Task 4", start: firstDay.addDays(10), end: firstDay.addDays(13), resource: "R1", priority: 1 },
      ];

      events.forEach((event) => {
        event.resource = event.resource + "." + event.priority;
      });

      dp.update({ resources, events });
    },

    addEventHandlers() {
      this.elements.showPriority.addEventListener("change", () => {
        dp.rowHeaderColumns[1].hidden = !this.elements.showPriority.checked;
        dp.update();
      });
    },

    init() {
      this.loadData();
      this.addEventHandlers();
    },
  };

  const dp = new DayPilot.Scheduler("dp", {
    timeHeaders: [{ groupBy: "Month" }, { groupBy: "Day", format: "d" }],
    scale: "Day",
    days: DayPilot.Date.today().daysInMonth(),
    startDate: DayPilot.Date.today().firstDayOfMonth(),
    cellWidth: 50,
    durationBarVisible: false,
    eventBorderRadius: 6,
    eventPadding: 5,
    rowMarginTop: 2,
    rowMarginBottom: 2,
    rowHeaderColumns: [
      { name: "Resource", display: "name" },
      { name: "Priority", display: "name", split: true },
    ],
    eventMoveHandling: "Update",
    timeRangeSelectedHandling: "Enabled",
    onTimeRangeSelected: async (args) => {
      const modal = await DayPilot.Modal.prompt("Create a new event:", "Event 1");
      dp.clearSelection();
      if (modal.canceled) {
        return;
      }

      const priority = Number(String(args.resource).split(".")[1]) || 1;

      dp.events.add({
        start: args.start,
        end: args.end,
        id: DayPilot.guid(),
        resource: args.resource,
        priority,
        text: modal.result,
      });
    },
    onBeforeEventRender: (args) => {
      const event = args.data;
      const priority = event.priority;

      switch (priority) {
        case 1:
          event.backColor = "#e19e92";
          break;
        case 2:
          event.backColor = "#f6b26b";
          break;
        case 3:
          event.backColor = "#93c47d";
          break;
        default:
          event.backColor = "#555555";
      }

      event.borderColor = "darker";
      event.fontColor = "#333";
      event.areas = [
        {
          right: 5,
          top: 5,
          width: 25,
          height: 25,
          text: priority,
          style: "text-align: center; line-height: 25px;",
          backColor: "#ffffff88",
          fontColor: "#333",
          borderRadius: "50%",
        },
      ];
    },
    onEventMove: (args) => {
      const priority = Number(String(args.newResource).split(".")[1]) || 1;
      args.e.data.resource = args.newResource;
      args.e.data.priority = priority;
    },
  });

  dp.init();
  app.init();
</script>

</body>
</html>
The sample project is available for download.
History
2026-04-20: Updated the tutorial to the current DayPilot Pro version and refreshed the sample project and screenshots.