Features
Introduction to using the Vue.js Scheduler component from DayPilot Pro for JavaScript
Includes a downloadable project with a simple Scheduler configuration that you can use as a start for your own implementation
The project includes all required dependencies
It uses a trial version of DayPilot Pro for JavaScript (see License below)
License
Licensed for testing and evaluation purposes. Please see the license agreement included in the sample project. You can use the source code of the tutorial if you are a licensed user of DayPilot Pro for JavaScript.
New Vue Project
We will generate a new Vue project using Vue CLI:
vue create vuejs-scheduler-quick-startThis will create an empty project with a sample HelloWorld component. In this tutorial, we will create a new component (Scheduler.vue) that will display a configured instance of DayPilot Pro Scheduler.
DayPilot Installation
DayPilot Pro for JavaScript includes a special Vue.js package (daypilot-pro-vue) that lets you use the scheduling components in Vue.js.
The installation links for NPM and Yarn are available at npm.daypilot.org:
yarn add https://npm.daypilot.org/daypilot-pro-vue/trial/2020.4.4788.tar.gzVue.js Scheduler Component
Now we can create our scheduler component.
The first version is very simple:
We import
DayPilotSchedulercomponent fromdaypilot-pro-vuepackage (in thecomponentssection)We add
<DayPilotScheduler>tag to the component template
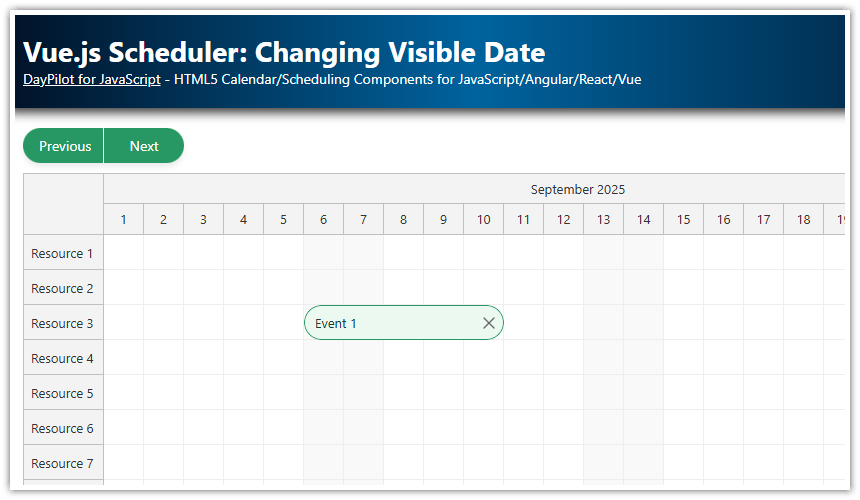
This is the minimum setup that displays the Scheduler with the default configuration and without any data.
src/components/Scheduler.vue
<template>
  <DayPilotScheduler id="dp" />
</template>

<script>
  import {DayPilotScheduler} from 'daypilot-pro-vue'

  export default {
    name: 'Scheduler',
    components: {
      DayPilotScheduler
    }
  }
</script>
Displaying the Scheduler

Now we can modify the main application component to display our new Scheduler component:
<template>
  <div id="app">
    <Scheduler />
  </div>
</template>

<script>
import Scheduler from './components/Scheduler.vue'

export default {
  name: 'app',
  components: {
    Scheduler
  }
}
</script>
Scheduler Configuration

The Scheduler properties can be set using a config object that is specified using config attribute:
<template>
  <DayPilotScheduler id="dp" :config="config" />
</template>
You can use this object to specify Scheduler properties and event handlers. We will add a couple of properties to adjust the visible time range, time header and rows (resources):
data: function() {
  return {
    config: {
      timeHeaders: [
        {groupBy: "Month"},
        {groupBy: "Day", format: "d"}
      ],
      scale: "Day",
      startDate: DayPilot.Date.today().firstDayOfYear(),
      days: DayPilot.Date.today().daysInYear(),
      resources: [
        {name: "Resource 1", id: "R1"},
        {name: "Resource 2", id: "R2"},
        {name: "Resource 3", id: "R3"}
      ]
    },
  }
}
The config object is automatically watched for changes. If you modify any property the Scheduler will be updated automatically.
Full source code:
<template>
  <DayPilotScheduler id="dp" :config="config" />
</template>

<script>
import {DayPilot, DayPilotScheduler} from 'daypilot-pro-vue'

export default {
  name: 'Scheduler',
  data: function() {
    return {
      config: {
        timeHeaders: [
          {groupBy: "Month"},
          {groupBy: "Day", format: "d"}
        ],
        scale: "Day",
        startDate: DayPilot.Date.today().firstDayOfYear(),
        days: DayPilot.Date.today().daysInYear(),
        resources: [
          {name: "Resource 1", id: "R1"},
          {name: "Resource 2", id: "R2"},
          {name: "Resource 3", id: "R3"}
        ]
      },
    }
  },
  components: {
    DayPilotScheduler
  }
}
</script>
Accessing the Direct Scheduler API

The Scheduler includes a rich API that will let you interact with the component directly. In order to use the API, we need a reference to the underlying DayPilot.Scheduler instance.
The DayPilot.Scheduler reference is available as control property of the DayPilotScheduler Vue.js component. If we add a ref attribute (ref="scheduler") to the <DayPilotScheduler> tag we can reach the component class as this.$refs.scheduler.control. We will add a shortcut using a scheduler computed property:
<template>
  <DayPilotScheduler id="dp" :config="config" ref="scheduler" />
</template>

<script>
import {DayPilot, DayPilotScheduler} from 'daypilot-pro-vue'

export default {
  name: 'Scheduler',
  data: function() {
    return {
      config: {
        // ...
      }
    }
  },
  components: {
    DayPilotScheduler
  },
  computed: {
    scheduler: function () {
      return this.$refs.scheduler.control;
    }
  },
}
</script>
Now we can call the Scheduler methods directly:
mounted: function() {
  this.scheduler.message("Welcome!");
}
Full Source Code
And this is the full source code of our new Scheduler.vue component:
<template>
  <DayPilotScheduler id="dp" :config="config" ref="scheduler" />
</template>

<script>
import {DayPilot, DayPilotScheduler} from 'daypilot-pro-vue'

export default {
  name: 'Scheduler',
  data: function() {
    return {
      config: {
        timeHeaders: [
          {groupBy: "Month"},
          {groupBy: "Day", format: "d"}
        ],
        scale: "Day",
        startDate: DayPilot.Date.today().firstDayOfYear(),
        days: DayPilot.Date.today().daysInYear(),
        resources: [
          {name: "Resource 1", id: "R1"},
          {name: "Resource 2", id: "R2"},
          {name: "Resource 3", id: "R3"},
          {name: "Resource 4", id: "R4"},
          {name: "Resource 5", id: "R5"},
          {name: "Resource 6", id: "R6"}
        ],
        onTimeRangeSelected: function (args) {
          var dp = this;
          DayPilot.Modal.prompt("Create a new event:", "Event 1").then(function(modal) {
            dp.clearSelection();
            if (!modal.result) { return; }
            dp.events.add({
              start: args.start,
              end: args.end,
              id: DayPilot.guid(),
              resource: args.resource,
              text: modal.result
            });
          });
        },
        events: [
          {id: 1, text: "Event 1", start: DayPilot.Date.today().addDays(2), end: DayPilot.Date.today().addDays(5), resource: "R2"}
        ]
      },
    }
  },
  props: {
  },
  components: {
    DayPilotScheduler
  },
  computed: {
    // DayPilot.Scheduler object - https://api.daypilot.org/daypilot-scheduler-class/
    scheduler: function () {
      return this.$refs.scheduler.control;
    }
  },
  methods: {
  },
  mounted: function() {
    this.scheduler.scrollTo(DayPilot.Date.today());
    this.scheduler.message("Welcome!");
  }
}
</script> DayPilot


