")
Overview
This React 19 + Vite application lets you schedule shifts for multiple locations
There are three 8-hour shifts defined for each day, starting at 12 AM, 8 AM, and 4 PM
The work schedule displays an overview for the selected location, where you can see who is assigned to each shift
The employee rows also show assignments from other locations, so you can see worker availability before creating or moving shifts
The row header displays totals for the selected location and for each employee
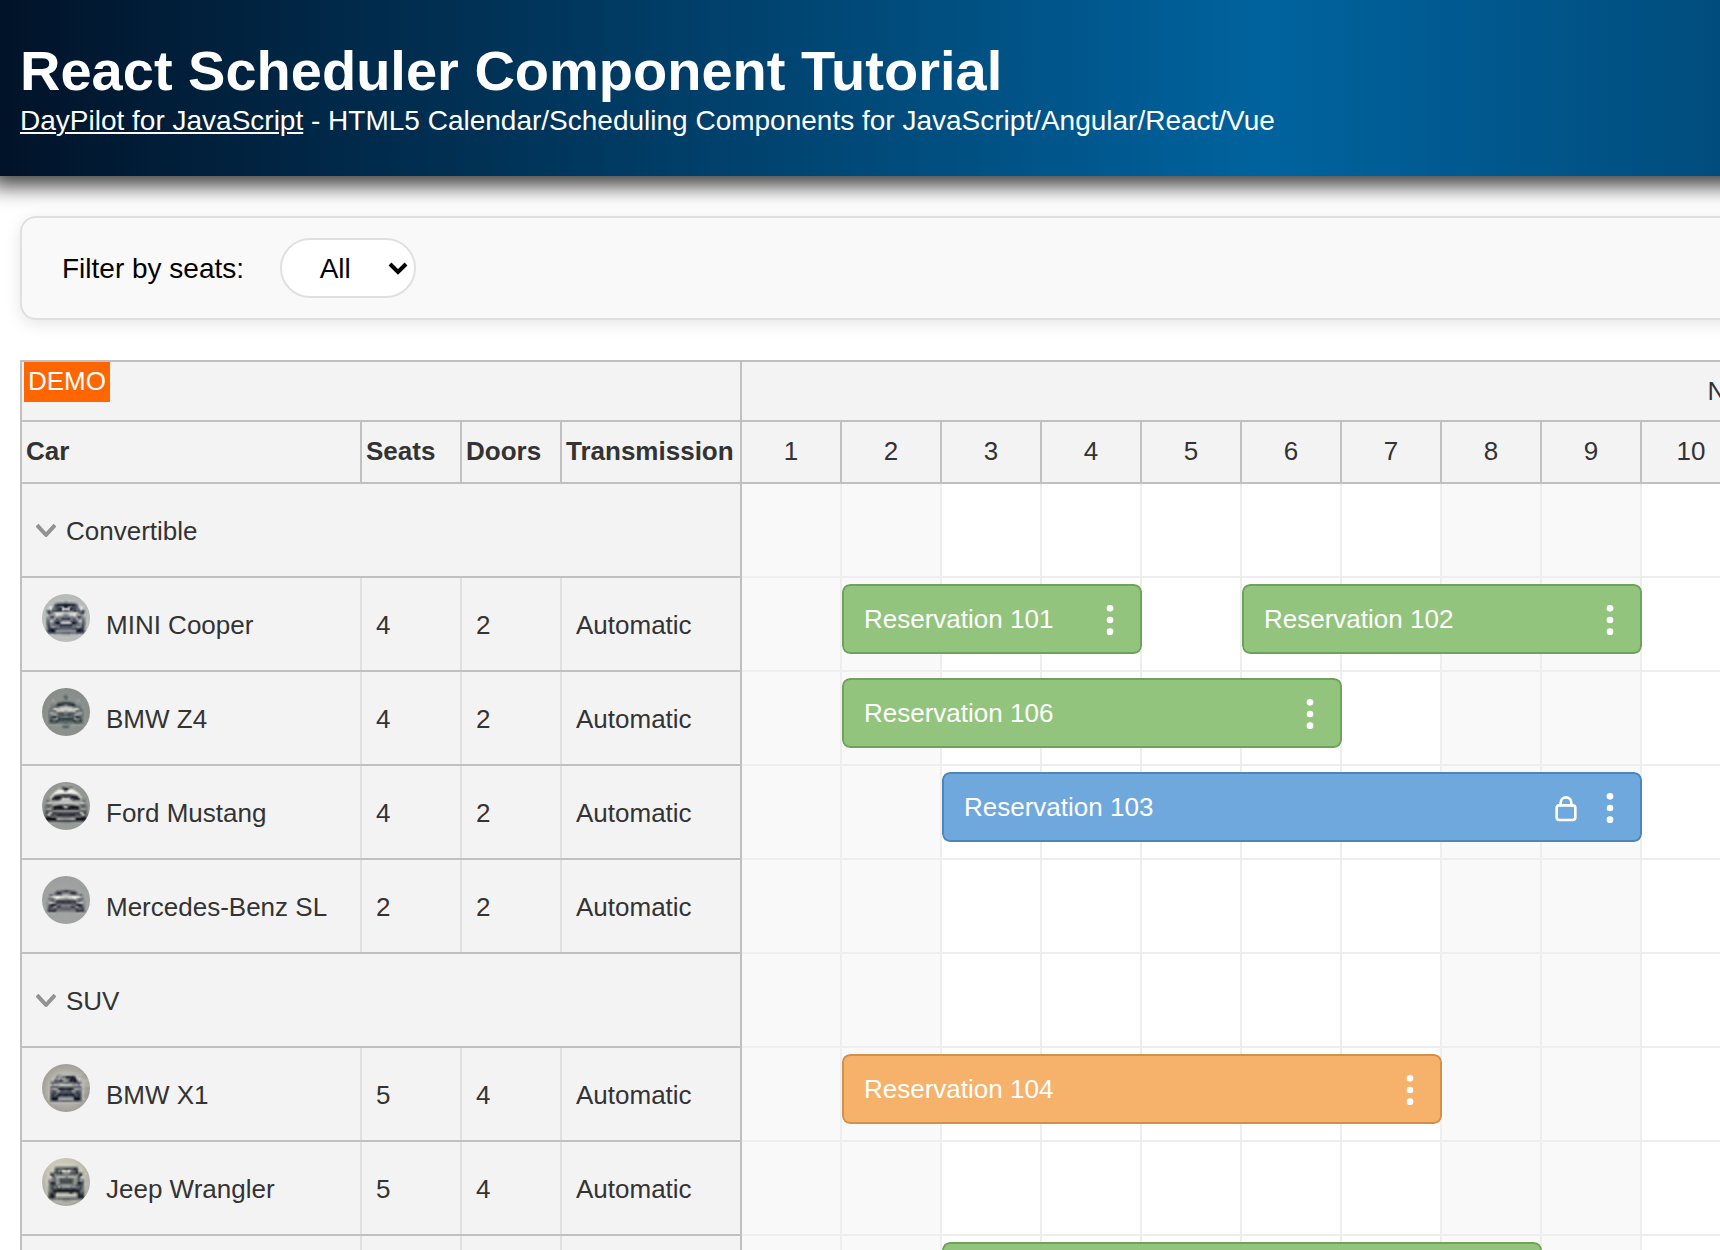
The frontend is a React application built using the React Scheduler component from DayPilot Pro for JavaScript
The backend is a REST API application created using PHP. It uses SQLite by default and can be switched to MySQL.
For an introduction to using the React Scheduler component please see the following tutorial:
See also an ASP.NET Core version of this tutorial:
License
Licensed for testing and evaluation purposes. See LICENSE.md in the sample project. You can use the source code of the tutorial if you are a licensed user of DayPilot Pro for JavaScript.
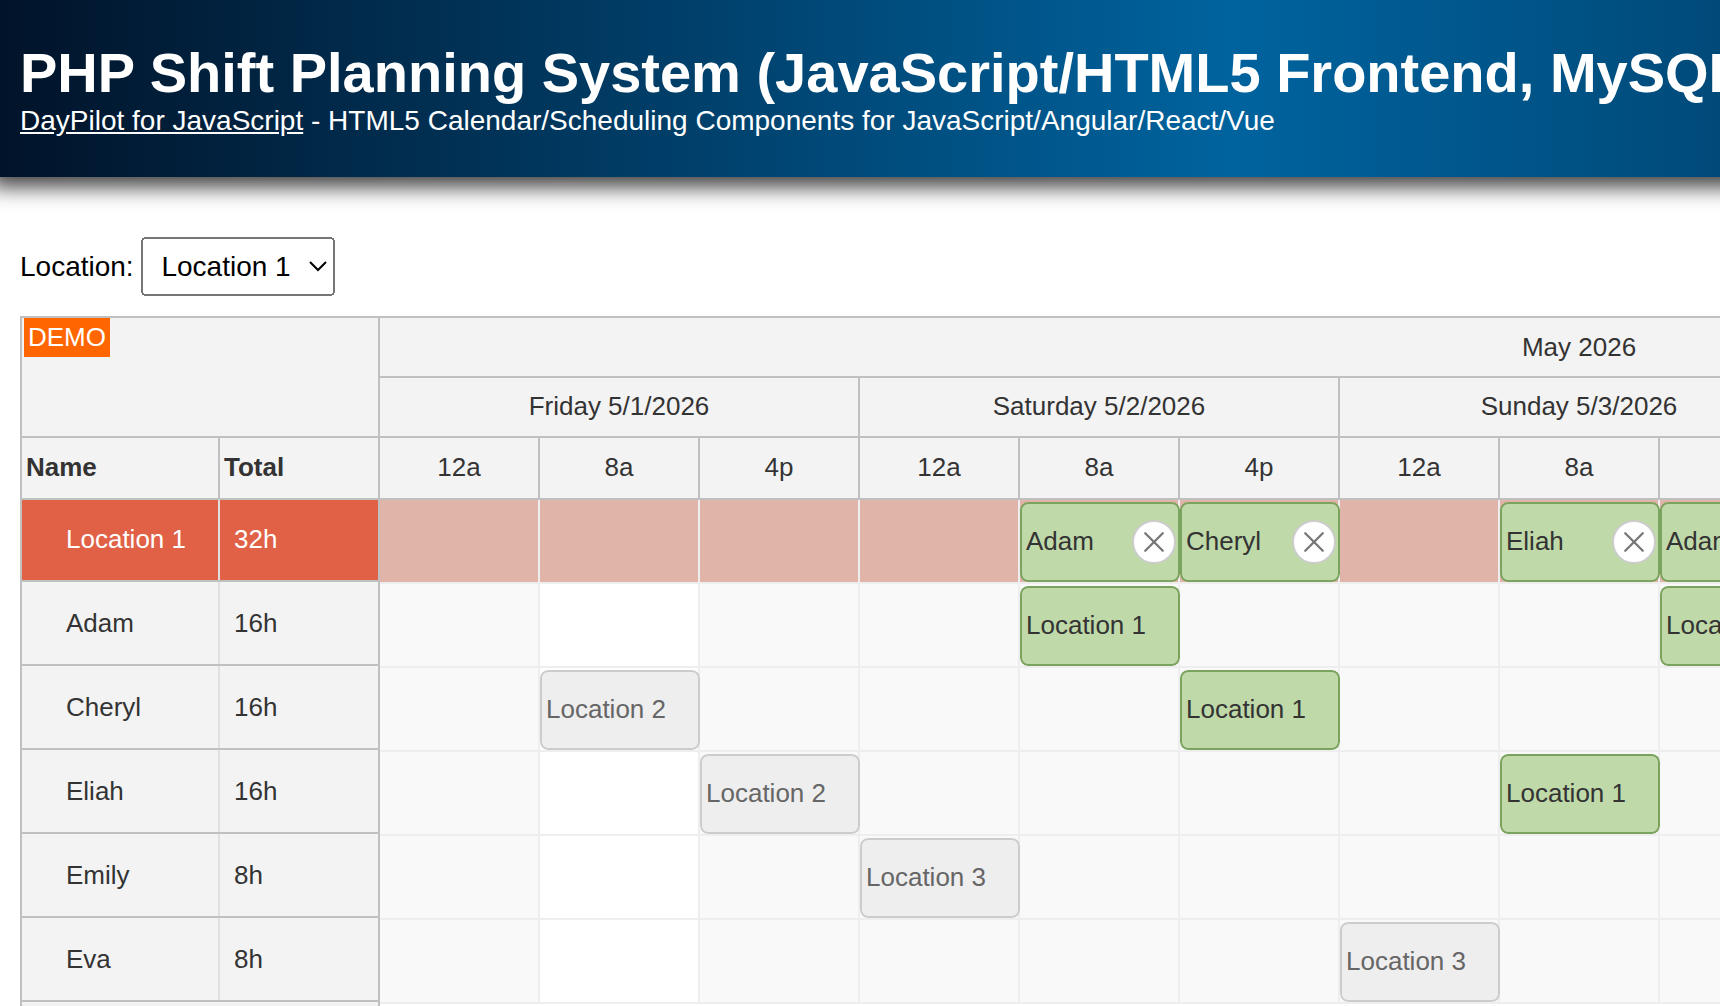
React Work Schedule for Multiple Locations

Each location view displays the shifts for the current work location in the first row. In the rows below, the Scheduler displays available employees.
Shifts planned for the selected location are displayed in blue and linked to the assigned person.
Each person row displays all shifts for that person, including assignments for other locations (they are displayed in gray).
This way you can see all shifts planned for the current location and also availability of all employees.
Location 2
You can see how the view changes after switching to a different location:
The first row displays all shifts for “Location 2”.
The shifts assigned to “Location 1” are displayed in gray color.

React Scheduler Configuration
This sample uses a React 19 + Vite frontend generated using the DayPilot UI Builder. Instead of keeping all Scheduler options in a single config object, the component passes the DayPilot props directly to <DayPilotScheduler />.
import React, { useEffect, useRef, useState } from 'react';
import { DayPilot, DayPilotScheduler } from 'daypilot-pro-react';
import Locations from './Locations.jsx';

const createTimeline = () => {
  const days = DayPilot.Date.today().daysInMonth();
  const start = DayPilot.Date.today().firstDayOfMonth();
  const timeline = [];

  for (let i = 0; i < days; i += 1) {
    const day = start.addDays(i);
    timeline.push({ start: day.addHours(0), end: day.addHours(8) });
    timeline.push({ start: day.addHours(8), end: day.addHours(16) });
    timeline.push({ start: day.addHours(16), end: day.addHours(24) });
  }

  return timeline;
};

const Scheduler = () => {
  const [scheduler, setScheduler] = useState(null);
  const [locations, setLocations] = useState([]);
  const [selectedLocation, setSelectedLocation] = useState(null);
  const [timeline] = useState(() => createTimeline());

  return (
    <div>
      <Locations
        data={locations}
        onChange={setSelectedLocation}
        selectedValue={selectedLocation}
      />
      <DayPilotScheduler
        timeHeaders={[
          { groupBy: 'Month' },
          { groupBy: 'Day', format: 'dddd M/d/yyyy' },
          { groupBy: 'Cell' },
        ]}
        scale="Manual"
        timeline={timeline}
        controlRef={setScheduler}
      />
    </div>
  );
};

export default Scheduler;
The Scheduler still opens on the current month, but the visible range now comes from createTimeline() because the sample uses a manual timeline:
const days = DayPilot.Date.today().daysInMonth();
const start = DayPilot.Date.today().firstDayOfMonth();
In the next steps, we will extend this configuration with additional properties and event handlers which will let us customize the behavior.
Define Shifts
In this step, we will define the shifts by overriding the default timeline generated by the Scheduler component.
In order to use a custom timeline, we switch the Scheduler to a manual timeline mode using the scale property:
<DayPilotScheduler
  scale="Manual"
  timeline={timeline}
  ...
/>
Now the Scheduler will use a timeline defined using individual cells in the timeline array:
const [timeline] = useState(() => createTimeline());Using the state initializer is enough here because the timeline is synchronous and only depends on the current date. There is no need for a second render just to populate the shift cells.
Our createTimeline() function defines the shifts as timeline cells. Each shift has 8 hours and we define three shifts per day:
12 AM - 8 AM
8 AM - 4 PM
4 PM - 12 AM
const createTimeline = () => {
  const days = DayPilot.Date.today().daysInMonth()
  const start = DayPilot.Date.today().firstDayOfMonth()
  const timeline = []

  for (let i = 0; i < days; i += 1) {
    const day = start.addDays(i)
    timeline.push({ start: day.addHours(0), end: day.addHours(8) })
    timeline.push({ start: day.addHours(8), end: day.addHours(16) })
    timeline.push({ start: day.addHours(16), end: day.addHours(24) })
  }

  return timeline
}
Our updated Scheduler configuration now uses the generated timeline with custom shifts:
const [timeline] = useState(() => createTimeline())

<DayPilotScheduler
  timeHeaders={[
    { groupBy: 'Month' },
    { groupBy: 'Day', format: 'dddd M/d/yyyy' },
    { groupBy: 'Cell' },
  ]}
  businessBeginsHour={0}
  businessEndsHour={24}
  businessWeekends
  scale="Manual"
  timeline={timeline}
  controlRef={setScheduler}
  ...
/>
As this is a plan for 24/7 shift rotation schedule, we override the default business hours to include the entire 24-hour period.
Display Data for a Selected Work Location

We are going to display a drop-down list with available locations above the main Scheduler. It lets us switch the current location and immediately reload the shift overview for that site.
The drop-down list is wrapped in a small <Locations /> component:
return (
  <div>
    <Locations
      data={locations}
      onChange={setSelectedLocation}
      selectedValue={selectedLocation}
    />
    <DayPilotScheduler
      timeline={timeline}
      controlRef={setScheduler}
      ...
    />
  </div>
)
When a user selects a different location, the component fires the onChange event. We use that event to update selectedLocation, which triggers a fresh Scheduler data load for the new location.
Locations.jsx
import React from 'react'

const Locations = ({ data = [], onChange, selectedValue }) => {
  const handleChange = (event) => {
    const value = Number.parseInt(event.target.value, 10)
    const selectedItem = data.find((item) => item.id === value)

    if (selectedItem && onChange) {
      onChange(selectedItem)
    }
  }

  return (
    <div className="toolbar">
      <label htmlFor="locations">Location:</label>
      <select id="locations" value={selectedValue?.id ?? ''} onChange={handleChange}>
        {data.map((item) => (
          <option key={item.id} value={item.id}>
            {item.name}
          </option>
        ))}
      </select>
    </div>
  )
}

export default Locations
How to Load Work Shift Data
The onChange event handler of the <Locations /> component updates the selectedLocation state variable whenever the selected location changes:
<Locations
  data={locations}
  onChange={setSelectedLocation}
  selectedValue={selectedLocation}
/>
We then add a useEffect hook that waits until both the Scheduler control and the selected location are ready, loads the data in parallel, and updates the view:
useEffect(() => {
  if (!scheduler || !selectedLocation) {
    return
  }

  const loadData = async () => {
    const start = scheduler.visibleStart()
    const end = scheduler.visibleEnd()

    const [{ data: people }, { data: assignments }] = await Promise.all([
      DayPilot.Http.get('/api/shift_people.php'),
      DayPilot.Http.get(
        `/api/shift_assignments.php?location=${selectedLocation.id}&start=${start}&end=${end}`,
      ),
    ])

    const resources = [
      { id: `L${selectedLocation.id}`, name: selectedLocation.name, type: 'location' },
      ...people,
    ]

    const links = assignments
      .filter((event) => event.type === 'location')
      .map((event) => ({
        id: event.id,
        from: event.id,
        to: event.join,
        type: 'FinishToFinish',
        layer: 'Above',
        color: '#e69138',
      }))

    scheduler.update({
      resources,
      events: assignments,
      links,
    })
  }

  void loadData()
}, [scheduler, selectedLocation])
This code loads rows and shift assignments using two parallel API calls (/api/shift_people.php and /api/shift_assignments.php). We use DayPilot.Http.get() to make the HTTP requests.
The two DayPilot.Http.get() calls are merged using Promise.all(). The application waits for both responses and updates the React Scheduler component with the combined location data in one pass.
It would be possible to keep the rows and events in React state and bind them directly as props, but in this sample we intentionally use the direct Scheduler API. The update() call replaces rows, events, and links together and refreshes the Scheduler as needed.
Add a Shift Assignment

We will use the onTimeRangeSelected event to handle clicks in the Scheduler grid.
Our onTimeRangeSelected event handler uses args.control to access the current Scheduler instance. It checks the target row first - it’s not possible to create a new assignment in the first row which shows the location assignments. We will display a warning using DayPilot.Modal.alert() that it’s necessary to create the assignment by selecting an employee (one of the rows below the location row).
After asking for confirmation, the React Scheduler creates a new assignment in the database by calling the /api/shift_create.php endpoint using DayPilot.Http.post(). Then it adds the corresponding location event, person event, and link on the client side.
const onTimeRangeSelected = async (args) => {
  const control = args.control
  const row = control.rows.find(args.resource)

  if (row?.index === 0) {
    await DayPilot.Modal.alert(
      'No assignment for this shift.<br><br>Click below to create a new assignment.',
    )
    control.clearSelection()
    return
  }

  const modal = await DayPilot.Modal.confirm('Create a new assignment?')
  control.clearSelection()

  if (modal.canceled || !selectedLocationRef.current) {
    return
  }

  const locationId = selectedLocationRef.current.id
  const { data } = await DayPilot.Http.post('/api/shift_create.php', {
    start: args.start,
    end: args.end,
    location: locationId,
    person: args.resource,
  })

  const id = data.id

  control.events.add({
    start: args.start,
    end: args.end,
    id,
    resource: args.resource,
    location: locationId,
    person: args.resource,
    join: id,
  })

  control.events.add({
    start: args.start,
    end: args.end,
    id: locationRowId(id),
    resource: locationRowId(locationId),
    location: locationId,
    person: args.resource,
    type: 'location',
    join: id,
  })

  control.links.add({
    id: locationRowId(id),
    from: locationRowId(id),
    to: id,
    type: 'FinishToFinish',
    layer: 'Above',
    color: '#e69138',
  })
}
Each assignment is represented by two Scheduler events (one in the location row and one in the person row) and a link between them which connects them visually. The location-row copy uses the L prefix in its id so both events can be paired easily.

Delete the Shift Assignment

In this step, we will add a custom delete icon to the location assignment. That will let users delete the shift assignment and free the slot.
The delete icon can be added by creating an event active area in the onBeforeEventRender event handler using the args.data.areas property. We only add this active area to the location-row event, which keeps the employee-row copy read-only.
if (isLocation) {
  const person = scheduler?.rows.find(args.data.person)

  args.data.fontColor = '#fff'
  args.data.backColor = '#3d85c6'
  args.data.borderColor = 'darker'
  args.data.barHidden = true
  args.data.text = person?.name ?? ''
  args.data.moveVDisabled = true
  args.data.areas = [
    {
      right: 5,
      top: 8,
      height: 22,
      width: 22,
      cssClass: 'scheduler_default_event_delete',
      style:
        'background-color: #fff; border: 1px solid #ccc; box-sizing: border-box; border-radius: 10px; padding: 0; border: 1px solid #999',
      visibility: 'Visible',
      onClick: async (areaArgs) => {
        const modal = await DayPilot.Modal.confirm('Delete this assignment?')

        if (modal.canceled) {
          return
        }

        const locationAssignment = areaArgs.source
        const locationAssignmentId = locationAssignment.data.id
        const personAssignmentId = locationAssignment.data.join

        await DayPilot.Http.post('/api/shift_delete.php', { id: personAssignmentId })

        scheduler.events.remove(locationAssignmentId)
        scheduler.events.remove(personAssignmentId)
        scheduler.links.remove(locationAssignmentId)
      },
    },
  ]
}
The onClick handler of the active area calls the backend using /api/shift_delete.php and removes both linked events together with the visual link.
Change the Shift Assignment using Drag and Drop
It’s possible to change the assigned person by dragging the employee assignment vertically:

It’s also possible to change the shift slot by dragging the assignment horizontally in the location row. The employee assignment remains the same in this case:

Each shift assignment is displayed as two linked events (one in the location row and one in the employee row). Both copies share the same join value, which lets the Scheduler treat them as a group during drag and drop (see Joint Events).
Each event type has a different movement constraint:
The location row event can only move horizontally, which lets us change the time slot while keeping the assigned employee.
The employee row event can only move vertically, which lets us change the assigned person while preserving the original shift time.
We enforce these rules in onBeforeEventRender:
In the location-row branch, we disable vertical moving:
args.data.moveVDisabled = trueAnd in the employee-row branch, we disable horizontal moving:
args.data.moveHDisabled = trueThe onEventMoving event handler improves the real-time drag feedback (see Drag and Drop Moving). It uses the args.multimove array (see Event Multi-Moving) to keep the linked event shadow synchronized:
When the user drags the location-row event, the linked employee-row shadow is updated to the same start/end immediately.
When the user drags the employee-row event, the handler locks the time slot for both linked shadows and only lets the target employee row change.
const onEventMoving = (args) => {
  const linkedAssignmentId =
    args.e.data.type === 'location' ? args.e.data.join : locationRowId(args.e.data.join);
  const linkedAssignment = args.multimove?.find(
    (item) => String(item.event.id()) === String(linkedAssignmentId),
  );

  if (args.e.data.type === 'location') {
    if (linkedAssignment) {
      linkedAssignment.start = args.start;
      linkedAssignment.end = args.end;
    }
    return;
  }

  args.start = args.e.start();
  args.end = args.e.end();

  // Keep the linked location event fixed to the same time slot during reassignment.
  if (linkedAssignment) {
    linkedAssignment.start = args.e.start();
    linkedAssignment.end = args.e.end();
  }
};
When the event is dropped at the target position, the Scheduler fires the onEventMove event handler. We use it to update the database record and sync the linked event on the client side.
const onEventMove = async (args) => {
  const control = args.control
  const event = args.e

  if (event.data.type === 'location') {
    const { data } = await DayPilot.Http.post('/api/shift_update_time.php', {
      id: event.data.join,
      start: args.newStart,
      end: args.newEnd,
    })

    const personAssignment = control.events.find(event.data.join)
    if (personAssignment) {
      personAssignment.data.start = args.newStart
      personAssignment.data.end = args.newEnd
      control.events.update(personAssignment)
    }

    control.message(data.message)
    return
  }

  const { data } = await DayPilot.Http.post('/api/shift_update_person.php', {
    id: event.data.join,
    person: args.newResource,
  })

  const locationAssignment = control.events.find(locationRowId(event.data.join))
  if (locationAssignment) {
    locationAssignment.data.person = args.newResource
    control.events.update(locationAssignment)
  }

  control.message(data.message)
}
PHP Backend
The refreshed frontend uses the Vite development server proxy instead of the older Create React App proxy middleware. In frontend/vite.config.js, the /api/* requests are forwarded to the PHP backend running at http://127.0.0.1:8090.
If you are updating an older version of the sample, note that the previous Create React App build used http-proxy-middleware. Vite provides the proxy directly in its dev server configuration, so no extra middleware package is needed now.
export default defineConfig({
  plugins: [react()],
  server: {
    proxy: {
      '/api': {
        target: 'http://127.0.0.1:8090',
        changeOrigin: true,
      },
    },
  },
})
You can start the API backend (react-shift-scheduling-php project) using the PHP built-in web server.
Linux/macOS:
cd backend
php -S 127.0.0.1:8090 -t .
Windows:
cd backend
C:\php\php.exe -S 127.0.0.1:8090 -t .
Then start the React frontend in a separate terminal:
cd frontend
npm install
npm run dev
MySQL Database Schema
By default, the PHP backend uses an SQLite database which will be created and initialized automatically at backend/api/daypilot.sqlite.
You can switch to MySQL by editing backend/api/_db.php. Make sure that you adjust the database connection parameters in backend/api/_db_mysql.php (server name, username, password, database name). The database will be created and initialized automatically if it doesn’t exist.
This is the MySQL database schema that will be used for the new database:
CREATE TABLE person (
  id INTEGER PRIMARY KEY,
  name VARCHAR(200)
);

CREATE TABLE location (
  id INTEGER PRIMARY KEY,
  name VARCHAR(200)
);

CREATE TABLE assignment (
  id INTEGER PRIMARY KEY AUTO_INCREMENT,
  person_id INTEGER,
  location_id INTEGER,
  assignment_start DATETIME,
  assignment_end DATETIME
);
Full Source Code
Here is the full source code of the React frontend component that displays the shift schedule (frontend/src/scheduler/Scheduler.jsx):
import React, { useEffect, useRef, useState } from 'react';
import { DayPilot, DayPilotScheduler } from 'daypilot-pro-react';
import Locations from './Locations.jsx';

const LOCATION_PREFIX = 'L';

const locationRowId = (id) => `${LOCATION_PREFIX}${id}`;

const createTimeline = () => {
  const days = DayPilot.Date.today().daysInMonth();
  const start = DayPilot.Date.today().firstDayOfMonth();
  const timeline = [];

  for (let i = 0; i < days; i += 1) {
    const day = start.addDays(i);
    timeline.push({ start: day.addHours(0), end: day.addHours(8) });
    timeline.push({ start: day.addHours(8), end: day.addHours(16) });
    timeline.push({ start: day.addHours(16), end: day.addHours(24) });
  }

  return timeline;
};

const Scheduler = () => {
  const [scheduler, setScheduler] = useState(null);
  const [locations, setLocations] = useState([]);
  const [selectedLocation, setSelectedLocation] = useState(null);
  const [timeline] = useState(() => createTimeline());

  const selectedLocationRef = useRef(null);

  const locationsRef = useRef([]);

  useEffect(() => {
    selectedLocationRef.current = selectedLocation;
  }, [selectedLocation]);

  useEffect(() => {
    locationsRef.current = locations;
  }, [locations]);

  useEffect(() => {
    const loadLocations = async () => {
      const { data } = await DayPilot.Http.get('/api/shift_locations.php');
      setLocations(data);

      if (!selectedLocationRef.current && data.length > 0) {
        setSelectedLocation(data[0]);
      }
    };

    void loadLocations();
  }, []);

  useEffect(() => {
    if (!scheduler || !selectedLocation) {
      return;
    }

    const loadData = async () => {
      const start = scheduler.visibleStart();
      const end = scheduler.visibleEnd();

      const [{ data: people }, { data: assignments }] = await Promise.all([
        DayPilot.Http.get('/api/shift_people.php'),
        DayPilot.Http.get(
          `/api/shift_assignments.php?location=${selectedLocation.id}&start=${start}&end=${end}`,
        ),
      ]);

      const resources = [
        { id: locationRowId(selectedLocation.id), name: selectedLocation.name, type: 'location' },
        ...people,
      ];

      const links = assignments
        .filter((event) => event.type === 'location')
        .map((event) => ({
          id: event.id,
          from: event.id,
          to: event.join,
          type: 'FinishToFinish',
          layer: 'Above',
          color: '#e69138',
        }));

      scheduler.update({
        resources,
        events: assignments,
        links,
      });
    };

    void loadData();
  }, [scheduler, selectedLocation]);

  const onTimeRangeSelected = async (args) => {
    const control = args.control;
    const row = control.rows.find(args.resource);

    if (row?.index === 0) {
      await DayPilot.Modal.alert(
        'No assignment for this shift.<br><br>Click below to create a new assignment.',
      );
      control.clearSelection();
      return;
    }

    const modal = await DayPilot.Modal.confirm('Create a new assignment?');
    control.clearSelection();

    if (modal.canceled || !selectedLocationRef.current) {
      return;
    }

    const locationId = selectedLocationRef.current.id;
    const { data } = await DayPilot.Http.post('/api/shift_create.php', {
      start: args.start,
      end: args.end,
      location: locationId,
      person: args.resource,
    });

    const id = data.id;

    control.events.add({
      start: args.start,
      end: args.end,
      id,
      resource: args.resource,
      location: locationId,
      person: args.resource,
      join: id,
    });

    control.events.add({
      start: args.start,
      end: args.end,
      id: locationRowId(id),
      resource: locationRowId(locationId),
      location: locationId,
      person: args.resource,
      type: 'location',
      join: id,
    });

    control.links.add({
      id: locationRowId(id),
      from: locationRowId(id),
      to: id,
      type: 'FinishToFinish',
      layer: 'Above',
      color: '#e69138',
    });
  };

  const onBeforeCellRender = (args) => {
    if (args.cell.y === 0) {
      args.cell.backColor = '#fff2cc';
    }
  };

  const onBeforeRowHeaderRender = (args) => {
    const duration = args.row.events.totalDuration();
    const totalColumn = args.row.columns[1];

    if (duration.totalHours() > 0 && totalColumn) {
      totalColumn.text = `${duration.totalHours()}h`;
    }

    if (args.row.data.type === 'location') {
      args.row.backColor = '#ffdb5f';
      args.row.fontColor = '#000';
      if (totalColumn) {
        totalColumn.fontColor = '#000';
      }
    }
  };

  const onEventMove = async (args) => {
    const control = args.control;
    const event = args.e;

    if (event.data.type === 'location') {
      const { data } = await DayPilot.Http.post('/api/shift_update_time.php', {
        id: event.data.join,
        start: args.newStart,
        end: args.newEnd,
      });

      const personAssignment = control.events.find(event.data.join);
      if (personAssignment) {
        personAssignment.data.start = args.newStart;
        personAssignment.data.end = args.newEnd;
        control.events.update(personAssignment);
      }

      control.message(data.message);
      return;
    }

    const { data } = await DayPilot.Http.post('/api/shift_update_person.php', {
      id: event.data.join,
      person: args.newResource,
    });

    const locationAssignment = control.events.find(locationRowId(event.data.join));
    if (locationAssignment) {
      locationAssignment.data.person = args.newResource;
      control.events.update(locationAssignment);
    }

    control.message(data.message);
  };

  const onTimeRangeSelecting = (args) => {
    if (args.duration.totalHours() > 8) {
      args.allowed = false;
      args.right.enabled = true;
      args.right.text = 'Max duration is 8 hours';
    }
  };

  const onBeforeGridLineRender = (args) => {
    const isLocationRow =
      args.row && typeof args.row.id === 'string' && args.row.id.startsWith(LOCATION_PREFIX);

    if (isLocationRow) {
      args.color = '#aaa';
    }
  };

  const onBeforeEventRender = (args) => {
    const isLocation = args.data.type === 'location';
    const inactive = args.data.type === 'inactive';

    if (isLocation) {
      const person = scheduler?.rows.find(args.data.person);

      args.data.fontColor = '#fff';
      args.data.backColor = '#3d85c6';
      args.data.borderColor = 'darker';
      args.data.barHidden = true;
      args.data.text = person?.name ?? '';
      args.data.moveVDisabled = true;
      args.data.areas = [
        {
          right: 5,
          top: 8,
          height: 22,
          width: 22,
          cssClass: 'scheduler_default_event_delete',
          style:
            'background-color: #fff; border: 1px solid #ccc; box-sizing: border-box; border-radius: 10px; padding: 0; border: 1px solid #999',
          visibility: 'Visible',
          onClick: async (areaArgs) => {
            const modal = await DayPilot.Modal.confirm('Delete this assignment?');

            if (modal.canceled) {
              return;
            }

            const locationAssignment = areaArgs.source;
            const locationAssignmentId = locationAssignment.data.id;
            const personAssignmentId = locationAssignment.data.join;

            await DayPilot.Http.post('/api/shift_delete.php', { id: personAssignmentId });

            scheduler.events.remove(locationAssignmentId);
            scheduler.events.remove(personAssignmentId);
            scheduler.links.remove(locationAssignmentId);
          },
        },
      ];
      return;
    }

    const location = locationsRef.current.find((item) => item.id === args.data.location);
    if (location) {
      args.data.text = location.name;
    }

    if (inactive) {
      args.data.backColor = '#eee';
      args.data.fontColor = '#666';
      args.data.barHidden = true;
      args.data.moveDisabled = true;
      args.data.resizeDisabled = true;
      return;
    }

    args.data.fontColor = '#fff';
    args.data.backColor = '#6fa8dc';
    args.data.borderColor = 'darker';
    args.data.barHidden = true;
    args.data.moveHDisabled = true;
  };

  const onEventMoving = (args) => {
    const linkedAssignmentId =
      args.e.data.type === 'location' ? args.e.data.join : locationRowId(args.e.data.join);
    const linkedAssignment = args.multimove?.find(
      (item) => String(item.event.id()) === String(linkedAssignmentId),
    );

    if (args.e.data.type === 'location') {
      if (linkedAssignment) {
        linkedAssignment.start = args.start;
        linkedAssignment.end = args.end;
      }
      return;
    }

    args.start = args.e.start();
    args.end = args.e.end();

    // Keep the linked location event fixed to the same time slot during reassignment.
    if (linkedAssignment) {
      linkedAssignment.start = args.e.start();
      linkedAssignment.end = args.e.end();
    }
  };

  return (
    <div>
      <Locations
        data={locations}
        onChange={setSelectedLocation}
        selectedValue={selectedLocation}
      />
      <DayPilotScheduler
        timeHeaders={[
          { groupBy: 'Month' },
          { groupBy: 'Day', format: 'dddd M/d/yyyy' },
          { groupBy: 'Cell' },
        ]}
        businessBeginsHour={0}
        businessEndsHour={24}
        businessWeekends
        scale="Manual"
        cellWidth={130}
        eventHeight={40}
        headerHeight={30}
        treeEnabled
        allowEventOverlap={false}
        multiMoveVerticalMode="Master"
        timeRangeSelectedHandling="Enabled"
        eventMoveHandling="Update"
        eventResizeHandling="Disabled"
        rowHeaderColumns={[
          { name: 'Name', display: 'name' },
          { name: 'Total' },
        ]}
        linkBottomMargin={20}
        linkShape="RightAngled"
        linkWidth={2}
        onBeforeTimeHeaderRender={(args) => {
          if (args.header.level === 2) {
            args.header.text =
              args.header.start.toString('h') +
              args.header.start.toString('tt').substring(0, 1).toLowerCase();
          }
        }}
        onTimeRangeSelected={onTimeRangeSelected}
        onBeforeCellRender={onBeforeCellRender}
        onBeforeRowHeaderRender={onBeforeRowHeaderRender}
        onEventMove={onEventMove}
        onTimeRangeSelecting={onTimeRangeSelecting}
        onBeforeGridLineRender={onBeforeGridLineRender}
        onBeforeEventRender={onBeforeEventRender}
        onEventMoving={onEventMoving}
        timeline={timeline}
        controlRef={setScheduler}
      />
    </div>
  );
};

export default Scheduler;
You can download the complete React project using the link at the top of the tutorial.
History
April 14, 2026: Upgraded to DayPilot Pro for JavaScript 2026.2.6903.
April 13, 2026: Upgraded the frontend to React 19 and Vite 7, upgraded to DayPilot Pro for JavaScript 2026.2.6899, switched the dev proxy to Vite, modernized the PHP backend for PHP 8.3, and fixed linked drag synchronization.
October 9, 2024: Upgraded to DayPilot Pro 2024.4.6190; PHP 8.3 compatibility; moving shifts in time fixed; styling updates.
July 18, 2023: Upgraded to DayPilot Pro 2023.2.5582; upgraded to React 18, Hooks API.
February 18, 2021: Initial release.