")
Overview
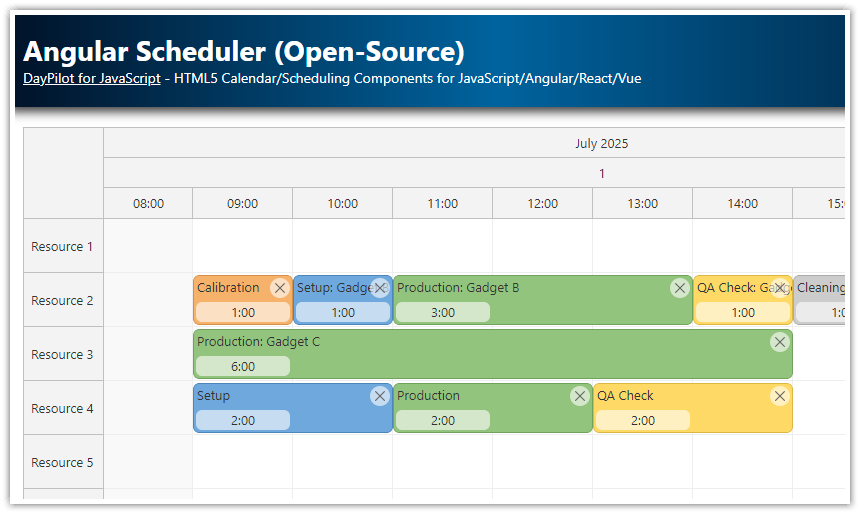
How to use Angular lazy loading to split your app by route and load features on demand.
The lazily loaded
/schedulerroute displays the Angular Scheduler component from the open-source DayPilot Lite for JavaScript.The initial bundle size is reduced to the necessary minimum.
See also other tips for improving the load time.
Angular Application Size and Loading Time

By default, Angular will produce one bundle that includes all dependencies and it will load it during the application startup. That means your users will have to wait until everything is loaded. It will work fine for small applications but for larger projects it will be necessary to apply a code splitting strategy that will reduce the initial loading time.
The bundle size can grow quickly, especially if you use third party libraries like DayPilot. DayPilot itself adds about 870 KB to the JavaScript bundle.
Depending on your Angular version, you may also see a warning or error like this:
Error: initial exceeded maximum budget. Budget 1.00 MB was not met by 94.98 kB with a total of 1.09 MB.
The main purpose of the error message is to warn you about the initial bundle size. On desktop machines running intranet applications, even a few megabytes won’t be a problem. However, on mobile devices with slow connection the loading time may become noticeable. In order to minimize the startup time, it’s a good idea to review optimization options and apply them if they are easily accessible.
How to Enable Route-Based Lazy Loading in Angular
Angular provides a solution - it lets you split the code into several components that will be loaded when needed. That will let you keep the initial bundle size small and load the additional components (with their dependencies) only when necessary. The following steps explain how to enable code splitting using Angular lazily loaded routes.
1. How to Enable Routing in Your Angular Application
When creating your Angular application, use the —routing parameter to enable routing.
ng new angular-scheduler-lazy-loading --routingThe generated application will include an app.routes.ts file that looks like this:
import { Routes } from '@angular/router';

export const routes: Routes = [];
The router is registered via provideRouter(...) in app.config.ts:
import { ApplicationConfig } from '@angular/core';
import { provideRouter } from '@angular/router';
import { routes } from './app.routes';

export const appConfig: ApplicationConfig = {
  providers: [provideRouter(routes)]
};
2. How to Add Lazily Loaded Routes
In this step, we will add a new standalone feature with the Angular Scheduler. This feature will handle the /scheduler route and display the Angular Scheduler component. The feature will be lazy-loaded when this route is activated in the browser.
You can use Angular CLI to generate the component:
ng generate component schedulerUpdate app.routes.ts to include the /scheduler route, like this:
import { Routes } from '@angular/router';
import { HomeComponent } from './home/home.component';

export const routes: Routes = [
  { path: '', component: HomeComponent, pathMatch: 'full' },
  {
    path: 'scheduler',
    loadChildren: () =>
      import('./scheduler/scheduler.routes').then(m => m.SCHEDULER_ROUTES),
  },
  { path: '**', redirectTo: '' }
];
The feature routes file (scheduler/scheduler.routes.ts) includes its own child routing logic that will instruct Angular which component to display:
import { Routes } from '@angular/router';

export const SCHEDULER_ROUTES: Routes = [
  {
    path: '',
    title: 'Scheduler',
    providers: [],
    children: [
      {
        path: '',
        loadComponent: () =>
          import('./scheduler.component').then(m => m.SchedulerComponent)
      },
    ]
  }
];
Make sure that the DayPilotModule is only imported in the lazily loaded component (SchedulerComponent). Otherwise, Angular would include it in the main bundle.
scheduler/scheduler.component.ts
import {AfterViewInit, Component, signal, ViewChild} from '@angular/core';
import {DataService} from "./data.service";
import {DayPilot, DayPilotModule, DayPilotSchedulerComponent} from '@daypilot/daypilot-lite-angular';
import SchedulerTimeRangeSelectedArgs = DayPilot.SchedulerTimeRangeSelectedArgs;

@Component({
  selector: 'app-scheduler',
  templateUrl: './scheduler.component.html',
  styleUrls: ['./scheduler.component.css'],
  providers: [DataService],
  imports: [DayPilotModule]
})
export class SchedulerComponent implements AfterViewInit {

  // ...

}
3. How to Pre-Load the Lazy Components
To improve the loading time of the Scheduler feature (which is now delayed until the user navigates to /scheduler) we can preload the lazy routes right after the application startup.
To enable pre-loading, use the preloading strategy via withPreloading(PreloadAllModules) when registering the router with provideRouter(...). If you specify PreloadAllModules as the strategy, the application will only load the bundles required for the initial startup, but it will also immediately start pre-loading the lazy routes. That will not affect the initial loading time but it will improve the loading time for the dynamic routes. (This works for both lazy modules and lazy standalone routes/components.)
app.config.ts
import { ApplicationConfig } from '@angular/core';
import { provideRouter, PreloadAllModules, withPreloading } from '@angular/router';
import { routes } from './app.routes';

export const appConfig: ApplicationConfig = {
  providers: [
    provideRouter(
      routes,
      withPreloading(PreloadAllModules)
    )
  ]
};
4. How Does the Lazy Loading Affect the Output Bundles
When you switch to lazy loading of the Scheduler module you will see that the ng build command creates a separate chunk for the /scheduler route (with all dependencies):

The size of the initial bundle is reduced to 254 kB which make the initial load of the Angular application much faster.
Further Performance Improvements
Enable HTTP Compression

The JavaScript files produced by Angular are text files that will benefit from HTTP compression. The HTTP compression can reduce the size of the data sent over the network by 70%.
Make sure that HTTP compression is enabled in your web server for JavaScript files. Most modern web servers will enable it automatically. You can see whether the compression is applied by checking the content-encoding response header (use the browser developer , Network tab).
Use a Content Delivery Network (CDN)
Using a CDN can reduce the time to 10% of the original download time (tens of milliseconds instead of hundreds of milliseconds). The CDN will serve the files from the location nearest to the client computer.
After configuring the CDN to mirror your site, you can tell Angular to load the JavaScript/CSS bundles from there using the --deploy-url parameter. This lets you serve the main application file (index.html) from your server and use the CDN for dependencies (JavaScript, CSS).
ng build --deploy-url=https://cdn.yourwebsite.com/Include a trailing / in the URL (e.g., https://cdn.yourwebsite.com/) so paths concatenate correctly. You can also set this in angular.json (build.options.deployUrl) if you prefer a config-based setup.