Features
This tutorial shows how to create a web application with scheduler UI using Angular CLI. It uses a backend implemented in Java using Spring Boot framework.
Frontend (angular-scheduler-spring-frontend directory):
Angular 17
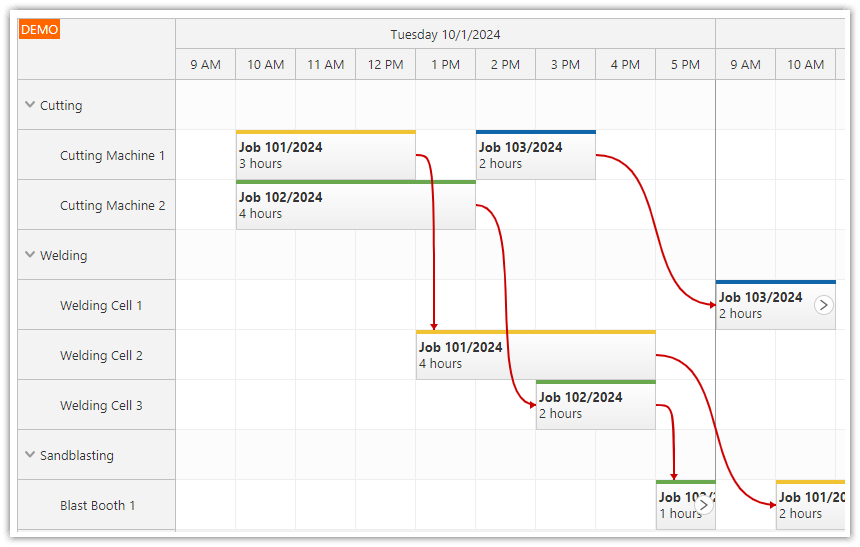
Scheduler UI built using DayPilot Angular Scheduler component
Resources (rows) and events are loaded from the backend using REST HTTP call
Supports event creating using drag and drop
Event moving using drag and drop
Includes a trial version of DayPilot Pro for JavaScript (see License below)
Backend (angular-scheduler-spring-backend directory):
Implemented in Java
Spring Boot 3.1.5
Set of simple REST/JSON endpoints
In-memory H2 database that is initialized (schema) on startup automatically
Hibernate/JPA is used for ORM
License
Licensed for testing and evaluation purposes. Please see the license agreement included in the sample project. You can use the source code of the tutorial if you are a licensed user of DayPilot Pro for JavaScript.
How to Create an Angular Frontend with the Scheduler Component

1. Create a New Angular CLI Project
Create a project using Angular CLI:
ng new angular-scheduler-spring-frontend2. Install DayPilot Pro Angular Package
Install DayPilot Pro package from npm.daypilot.org:
npm install https://npm.daypilot.org/daypilot-pro-angular/trial/2020.4.4807.tar.gz --save3. Create a New Scheduler Module
Create a new module in src/app/scheduler/scheduler.module.ts:
import {DataService} from "./data.service";
import {CommonModule} from "@angular/common";
import {NgModule} from "@angular/core";
import {SchedulerComponent} from "./scheduler.component";
import {DayPilotModule} from "daypilot-pro-angular";
import {HttpClientModule} from "@angular/common/http";

@NgModule({
  imports: [
    CommonModule,
    HttpClientModule,
    DayPilotModule
  ],
  declarations: [
    SchedulerComponent
  ],
  exports: [SchedulerComponent],
  providers: [DataService]
})
export class SchedulerModule {
}
All Scheduler-related code will be located in this module. We will minimize changes to the files generated by Angular CLI (such as app.module.ts, app.component.ts) in order to make Angular CLI version upgrade easier (new Angular CLI versions are released often and upgrade requires updating all generated code).
Note that it is necessary to add DayPilotModule from daypilot-pro-angular package to the imports. We also declare SchedulerComponent and DataServices - two classes that we are going to create in the following steps.
The generated files require the following two modifications:
1. Change src/app/app.component.html as follows:
<scheduler-component></scheduler-component>2. Import SchedulerModule in src/app/app.component.ts:
import { Component } from '@angular/core';
import { CommonModule } from '@angular/common';
import { RouterOutlet } from '@angular/router';
import {SchedulerModule} from "./scheduler/scheduler.module";

@Component({
  selector: 'app-root',
  standalone: true,
  imports: [CommonModule, RouterOutlet, SchedulerModule],
  templateUrl: './app.component.html',
  styleUrls: ['./app.component.css']
})
export class AppComponent {
}
4. Create Angular Scheduler Component
Create a new SchedulerComponent class in src/app/scheduler/scheduler.component.ts:
import {Component} from '@angular/core';

@Component({
  selector: 'scheduler-component',
  template: `
    <daypilot-scheduler></daypilot-scheduler>
  `,
  styles: [``]
})
export class SchedulerComponent {
}
5. Scheduler Configuration
Add scheduler, events and config properties to the SchedulerComponent class in src/app/scheduler/scheduler.component.ts:
import {Component, ViewChild} from '@angular/core';
import {DayPilotSchedulerComponent} from "daypilot-pro-angular";

@Component({
  selector: 'scheduler-component',
  template: `
  <div class="body">
    <h1>Scheduler</h1>
    <daypilot-scheduler [config]="config" [events]="events" #scheduler></daypilot-scheduler>
  </div>
  `,
  styles: [`
  .body {
    padding: 10px;
  }
  `]
})
export class SchedulerComponent {

  @ViewChild("scheduler")
  scheduler!: DayPilotSchedulerComponent;

  events: DayPilot.EventData[] = [];

  config: DayPilot.SchedulerConfig = {
    timeHeaders : [
      {groupBy: "Month", format: "MMMM yyyy"},
      {groupBy: "Day", format: "d"}
    ],
    days: 31,
    startDate: "2021-10-01",
    scale: "Day"
  };

}
If we run the Angular application now using ng serve we will see a page with empty Scheduler control at http://localhost:4200/:
Because the backend project will run on a different port (8081) we'll add a proxy configuration that will forward local /api requests to the backend server (http://localhost:8081/api):
proxy.conf.json:
{
  "/api": {
    "target": "http://localhost:8081",
    "secure": false
  }
}
We need to specify the proxy configuration when running the Angular CLI serve command:
ng serve --proxy-config proxy.conf.jsonFor your convenience, it's also added to the "start" script in package.json so you can run the development server simply by calling:
npm run startHow to Create a Scheduling App Backend in Spring Boot (Java)
1. Create a New Spring Boot Project
Create a new Maven project that will use org.springframework.boot:spring-boot-starter-parent project as a parent.
Add the following dependencies:
org.springframework.boot:spring-boot-starter-weborg.springframework.boot:spring-boot-starter-data-jpacom.h2database:h2
Our Scheduler backend project will use Hibernate and H2 database for DB persistence:
pom.xml:
<project xmlns="http://maven.apache.org/POM/4.0.0" xmlns:xsi="http://www.w3.org/2001/XMLSchema-instance"
         xsi:schemaLocation="http://maven.apache.org/POM/4.0.0 http://maven.apache.org/xsd/maven-4.0.0.xsd">
    <modelVersion>4.0.0</modelVersion>
    <parent>
        <groupId>org.springframework.boot</groupId>
        <artifactId>spring-boot-starter-parent</artifactId>
        <version>3.1.5</version>
        <relativePath/>
    </parent>
    <groupId>org.daypilot.demo</groupId>
    <artifactId>angular-scheduler-spring-backend</artifactId>
    <version>0.0.1-SNAPSHOT</version>

    <!-- add: -->
    <properties>
        <java.version>17</java.version>
    </properties>
    <dependencies>
        <dependency>
            <groupId>org.springframework.boot</groupId>
            <artifactId>spring-boot-starter-web</artifactId>
        </dependency>
        <dependency>
            <groupId>com.h2database</groupId>
            <artifactId>h2</artifactId>
            <scope>runtime</scope>
        </dependency>
        <dependency>
            <groupId>org.springframework.boot</groupId>
            <artifactId>spring-boot-starter-data-jpa</artifactId>
        </dependency>
    </dependencies>

</project>
2. Create a Spring Boot Application Class
Create org.daypilot.demo.angularscheduler.Application class:
package org.daypilot.demo.angularscheduler;

import org.springframework.boot.SpringApplication;
import org.springframework.boot.autoconfigure.SpringBootApplication;

@SpringBootApplication
public class Application {
    public static void main(String[] args) throws Exception {
        SpringApplication.run(Application.class, args);
    }
}
3. Create Domain Classes (JPA/Hibernate)
Create JPA domain classes (Event and Resource classes in org.daypilot.demo.angularscheduler.domain package):
Event.java
package org.daypilot.demo.angularscheduler.domain;

import java.time.LocalDateTime;

import jakarta.persistence.*;

import com.fasterxml.jackson.annotation.JsonIgnore;
import com.fasterxml.jackson.annotation.JsonProperty;

@Entity
public class Event {

	@Id
	@GeneratedValue(strategy=GenerationType.IDENTITY)
	Long id;

	String text;

	@Column(name="event_start")
	LocalDateTime start;

	@Column(name="event_end")
	LocalDateTime end;

	@ManyToOne
	@JsonIgnore
	Resource resource;

	@JsonProperty("resource")
	public Long getResourceId() {
		return resource.getId();
	}

	public Long getId() {
		return id;
	}

	public void setId(Long id) {
		this.id = id;
	}

	public String getText() {
		return text;
	}

	public void setText(String text) {
		this.text = text;
	}

	public LocalDateTime getStart() {
		return start;
	}

	public void setStart(LocalDateTime start) {
		this.start = start;
	}

	public LocalDateTime getEnd() {
		return end;
	}

	public void setEnd(LocalDateTime end) {
		this.end = end;
	}

	public Resource getResource() {
		return resource;
	}

	public void setResource(Resource resource) {
		this.resource = resource;
	}

}
Resource.java
package org.daypilot.demo.angularscheduler.domain;

import jakarta.persistence.Entity;
import jakarta.persistence.GeneratedValue;
import jakarta.persistence.GenerationType;
import jakarta.persistence.Id;

@Entity
public class Resource {

	@Id
	@GeneratedValue(strategy=GenerationType.IDENTITY)
	Long Id;

	String name;

	Integer capacity;

	String status;

	public Long getId() {
		return Id;
	}

	public void setId(Long id) {
		this.Id = id;
	}

	public String getName() {
		return name;
	}

	public void setName(String name) {
		this.name = name;
	}

	public Integer getCapacity() {
		return capacity;
	}

	public void setCapacity(Integer capacity) {
		this.capacity = capacity;
	}

	public String getStatus() {
		return status;
	}

	public void setStatus(String status) {
		this.status = status;
	}
}
4. Configure the H2 Database (In-Memory)
Create application.properties file in src/main/resource directory and add the following properties:
spring.datasource.url=jdbc:h2:mem:mydb
spring.h2.console.enabled=true
spring.jpa.hibernate.ddl-auto=create
spring.jpa.defer-datasource-initialization=true

server.port=${port:8081}
This configuration will create an in-memory H2 database (called mydb) on application startup and automatically create the database schema from the domain classes (spring.jpa.hibernate.ddl-auto property).
The spring.h2.console.enabled property enables the built-in H2 database console which you can use to manage the database (http://localhost:8081/h2console).
We have also added spring.jpa.defer-datasource-initialization to ensure the execution of data.sql occurs after the schema initialization.
The server.port property changes the default 8080 port to 8081 to avoid conflicts with a local Tomcat server installation.
5. Initialize the Database with Sample Resource Data
We will initialize the database with some data using data.sql file (src/main/resources directory):
insert into resource (name, capacity, status) values ('Box 1', 50, 'locked');
insert into resource (name, capacity) values ('Box 2', 100);
insert into resource (name, capacity) values ('Box 3', 100);
insert into resource (name, capacity, status) values ('Box 4', 150, 'locked');
insert into resource (name, capacity, status) values ('Box 5', 150, 'locked');
insert into resource (name, capacity, status) values ('Box 6', 50, 'locked');
insert into resource (name, capacity) values ('Box 7', 50);
insert into resource (name, capacity) values ('Box 8', 50);
insert into resource (name, capacity) values ('Box 9', 50);
6. Create the DAO Classes
Create the repository (data access) classes in org.daypilot.demo.angularscheduler.repository package:
ResourceRepository.java
package org.daypilot.demo.angularscheduler.repository;

import org.daypilot.demo.angularscheduler.domain.Resource;
import org.springframework.data.repository.CrudRepository;

public interface ResourceRepository extends CrudRepository<Resource, Long> {
}
EventRepository.java
package org.daypilot.demo.angularscheduler.repository;

import org.daypilot.demo.angularscheduler.domain.Event;
import org.springframework.data.repository.CrudRepository;

public interface EventRepository extends CrudRepository<Event, Long> {
}
7. Create the Controller with REST/JSON Endpoints
Create a new MainController class in org.daypilot.demo.angularscheduler.controller package:
package org.daypilot.demo.angularscheduler.controller;

import org.daypilot.demo.angularscheduler.domain.Event;
import org.daypilot.demo.angularscheduler.domain.Resource;
import org.daypilot.demo.angularscheduler.repository.EventRepository;
import org.daypilot.demo.angularscheduler.repository.ResourceRepository;
import org.springframework.beans.factory.annotation.Autowired;
import org.springframework.web.bind.annotation.RequestMapping;
import org.springframework.web.bind.annotation.ResponseBody;
import org.springframework.web.bind.annotation.RestController;


@RestController
public class MainController {

    @Autowired
    EventRepository er;

    @Autowired
    ResourceRepository rr;

    @RequestMapping("/api")
    @ResponseBody
    String home() {
        return "Welcome!";
    }

}
8. Test
Now you can run the application and test the REST API using http://localhost:8081/api. It returns the welcome string:
Welcome!How to Integrate the Angular Scheduler Application with the Spring Boot Backend
1. Create a DataService Class for Communication with the Backend
First we will create a helper DataService that will make calls to the backend JSON API and return the results using an Observable.
The empty DataService will look like this:
import {HttpClient} from "@angular/common/http";
import {Injectable} from '@angular/core';
import {Observable} from 'rxjs';
import {DayPilot} from 'daypilot-pro-angular';

@Injectable()
export class DataService {

  constructor(private http : HttpClient){
  }

}
We need to register the DataService class as a provider in scheduler.module.ts:
// ...

@NgModule({
  // ...
  providers: [
    DataService
  ],
  // ...
})

// ...
We will also ask for an instance of DataService to be injected into SchedulerComponent class (scheduler.component.ts) so we can use it:
// ...
export class SchedulerComponent {

  // ...

  constructor(private ds: DataService) {}

  // ...

}
2. Load Resources from the Spring Backend and Display Them in the Angular Scheduler Component

We want to load the Scheduler rows (resources) as soon as the SchedulerComponent is displayed.
package org.daypilot.demo.angularscheduler.controller;

import org.daypilot.demo.angularscheduler.domain.Event;
import org.daypilot.demo.angularscheduler.domain.Resource;
import org.daypilot.demo.angularscheduler.repository.EventRepository;
import org.daypilot.demo.angularscheduler.repository.ResourceRepository;
import org.springframework.beans.factory.annotation.Autowired;
import org.springframework.web.bind.annotation.RequestMapping;
import org.springframework.web.bind.annotation.ResponseBody;
import org.springframework.web.bind.annotation.RestController;

@RestController
public class MainController {

    @Autowired
    EventRepository er;

    @Autowired
    ResourceRepository rr;

    @RequestMapping("/")
    @ResponseBody
    String home() {
        return "Welcome!";
    }

    @RequestMapping("/api/resources")
    Iterable<Resource> resources() {
    	return rr.findAll();
    }

}
The new endpoint (/api/resources) returns an array of resources in JSON format:
[{"name":"Resource 1","id":1},{"name":"Resource 2","id":2},{"name":"Resource 3","id":3}]Now we want to request the resource data using the Angular frontend and pass it to the Scheduler:
import {Component, ViewChild, AfterViewInit} from '@angular/core';
import {DayPilotSchedulerComponent} from "daypilot-pro-angular";
import {DataService} from "./data.service";

@Component({
  selector: 'scheduler-component',
  template: `
  <div class="body">
    <h1>Scheduler</h1>
    <daypilot-scheduler [config]="config" [events]="events" #scheduler></daypilot-scheduler>
  </div>
  `,
  styles: [``]
})
export class SchedulerComponent implements AfterViewInit {

  // ...

  constructor(private ds: DataService) {}

  ngAfterViewInit(): void {
    this.ds.getResources().subscribe(result => this.config.resources = result);
  }
}
The row header will display the following columns:
Storage Box (name)
Capacity
Status
You can define the row header columns using the rowHeaderColumns config property:
config: DayPilot.SchedulerConfig = {
  rowHeaderColumns: [
    {text: 'Storage Box', width: 100},
    {text: 'Capacity', width: 60, display: "capacity"},
    {text: 'Status', width: 50},
  ],

  // ...

}
To customize the row header content and display the lock icon in the third column where appropriate, we will using the onBeforeRowHeaderRender event handler:
config: DayPilot.SchedulerConfig = {
  onBeforeRowHeaderRender: args => {
    args.row.columns[1].horizontalAlignment = "center";
    if (args.row.data.status === "locked") {
      args.row.columns[2].areas = [
        {left: "calc(50% - 8px)", top: 10, width: 20, height: 20, symbol: "/assets/daypilot.svg#padlock", fontColor: "#777777"}
      ];
    }
  },

  // ...

}
3. Load Events from the Spring Backend and Display Them in the Angular Scheduler Component

In order to load the event data from the server we will add a new events() method to the MainController Java class.
This method will be mapped to the /api/events endpoint. It requires the data range to be specified using from and to query string parameters (/api/events?from=2024-10-01T00:00:00&to=2024-11-01T00:00:00).
package org.daypilot.demo.angularscheduler.controller;

import java.time.LocalDateTime;

import javax.transaction.Transactional;

import org.daypilot.demo.angularscheduler.domain.Event;
import org.daypilot.demo.angularscheduler.domain.Resource;
import org.daypilot.demo.angularscheduler.repository.EventRepository;
import org.daypilot.demo.angularscheduler.repository.ResourceRepository;
import org.springframework.beans.factory.annotation.Autowired;
import org.springframework.format.annotation.DateTimeFormat;
import org.springframework.format.annotation.DateTimeFormat.ISO;
import org.springframework.web.bind.annotation.GetMapping;
import org.springframework.web.bind.annotation.PostMapping;
import org.springframework.web.bind.annotation.RequestBody;
import org.springframework.web.bind.annotation.RequestMapping;
import org.springframework.web.bind.annotation.RequestParam;
import org.springframework.web.bind.annotation.ResponseBody;
import org.springframework.web.bind.annotation.RestController;


@RestController
public class MainController {

    @Autowired
    EventRepository er;

    @Autowired
    ResourceRepository rr;

    @RequestMapping("/api")
    @ResponseBody
    String home() {
        return "Welcome!";
    }

    @RequestMapping("/api/resources")
    Iterable<Resource> resources() {
    	return rr.findAll();
    }

    @GetMapping("/api/events")
    Iterable<Event> events(@RequestParam("from") @DateTimeFormat(iso=ISO.DATE_TIME) LocalDateTime from, @RequestParam("to") @DateTimeFormat(iso=ISO.DATE_TIME) LocalDateTime to) {
    	return er.findBetween(from, to);
    }
}
Angular:
import {Component, ViewChild, AfterViewInit} from '@angular/core';
import {DayPilotSchedulerComponent} from "daypilot-pro-angular";
import {DataService} from "./data.service";

@Component({
  selector: 'scheduler-component',
  template: `
  <div class="body">
    <h1>Scheduler</h1>
    <daypilot-scheduler [config]="config" [events]="events" #scheduler></daypilot-scheduler>
  </div>
  `,
  styles: [``]
})
export class SchedulerComponent implements AfterViewInit {

  @ViewChild("scheduler")
  scheduler!: DayPilotSchedulerComponent;

  // ...

  constructor(private ds: DataService) {}

  ngAfterViewInit(): void {
    this.ds.getResources().subscribe(result => this.config.resources = result);

    var from = this.scheduler.control.visibleStart();
    var to = this.scheduler.control.visibleEnd();
    this.ds.getEvents(from, to).subscribe(result => this.events = result);
  }
}
4. Create Events using Drag and Drop in the Scheduler Component and Save Them to the Database

We will handle the onTimeRangeSelected event of the Scheduler to create a new event. But first, we need to create the JSON endpoint in the backend.
The event handler is specified using onTimeRangeSelected property of the config object.
It displays a simple prompt dialog to get the new event name.
It calls
/api/events/createendpoint to store the new event. The endpoint returns event data object.We wait until the new event data object is returned and we add it to the
eventsarray.The Scheduler displays it as soon as the change of
eventsis detected.
Angular Frontend: SchedulerComponent (scheduler.component.ts)
import {Component, ViewChild, AfterViewInit} from '@angular/core';
import {DayPilotSchedulerComponent} from "daypilot-pro-angular";
import {DataService, CreateEventParams} from "./data.service";

@Component({
  selector: 'scheduler-component',
  template: `
  <div class="body">
    <h1>Scheduler</h1>
    <daypilot-scheduler [config]="config" [events]="events" #scheduler></daypilot-scheduler>
  </div>
  `,
  styles: [``]
})
export class SchedulerComponent implements AfterViewInit {

  // ...

  @ViewChild("scheduler")
  scheduler: DayPilotSchedulerComponent;

  config: DayPilot.SchedulerConfig = {
    timeHeaders : [
      {groupBy: "Month", format: "MMMM yyyy"},
      {groupBy: "Day", format: "d"}
    ],
    startDate: DayPilot.Date.today().firstDayOfYear(),
    days: DayPilot.Date.today().daysInYear(),
    scale: "Day",
    onTimeRangeSelected: args => {
      DayPilot.Modal.prompt("New event name:", "Event").then(modal => {
        this.scheduler.control.clearSelection();
        if (!modal.result) {
          return;
        }

        let params: EventCreateParams = {
          start: args.start.toString(),
          end: args.end.toString(),
          text: modal.result,
          resource: args.resource
        };
        this.ds.createEvent(params).subscribe(result => {
          this.events.push(result);
          this.scheduler.control.message("Event created");
        } );

      });
    },
  };

  // ...

}
Angular Frontend: DataService class (data.service.ts)
import {Injectable} from '@angular/core';
import {Observable} from 'rxjs';
import {DayPilot} from 'daypilot-pro-angular';
import {HttpClient} from "@angular/common/http";


@Injectable()
export class DataService {

  constructor(private http : HttpClient){
  }

  // ...

  createEvent(data: EventCreateParams): Observable<EventData> {
    return this.http.post("/api/events/create", data) as Observable<any>;
  }

}

export interface EventCreateParams {
  start: string;
  end: string;
  text: string;
  resource: string | number;
}

export interface EventData {
  id: string | number;
  start: string;
  end: string;
  text: string;
  resource: string | number;
}
Spring Boot Backend: MainController.java
package org.daypilot.demo.angularscheduler.controller;

// ...

@RestController
public class MainController {

    @Autowired
    EventRepository er;

    @Autowired
    ResourceRepository rr;


    // ...

    @PostMapping("/api/events/create")
    @Transactional
    Event createEvent(@RequestBody EventCreateParams params) {

        Resource r = rr.findOne(params.resource);

        Event e = new Event();
    	e.setStart(params.start);
    	e.setEnd(params.end);
    	e.setText(params.text);
    	e.setResource(r);

    	er.save(e);

    	return e;
    }


    public static class EventCreateParams {
    	public LocalDateTime start;
  		public LocalDateTime end;
	  	public String text;
		  public Long resource;
    }

}
5. Move Events using Drag and Drop and Update the Database

Event moving is enabled by default in the Scheduler.
We need to handle onEventMove event and notify the server about the new location.
This time we don't update the event data in
eventsarray. It will be updated automatically (the default eventMoveHandling action is set to"Update").
Angular Frontend: SchedulerComponent
import {Component, ViewChild, AfterViewInit} from '@angular/core';
import {DayPilotSchedulerComponent} from "daypilot-pro-angular";
import {DataService, CreateEventParams, MoveEventParams} from "./data.service";

@Component({
  selector: 'scheduler-component',
  template: `
  <div class="body">
    <h1>Scheduler</h1>
    <daypilot-scheduler [config]="config" [events]="events" #scheduler></daypilot-scheduler>
  </div>
  `,
  styles: [``]
})
export class SchedulerComponent implements AfterViewInit {

  @ViewChild("scheduler")
  scheduler!: DayPilotSchedulerComponent;

  // ..

  config: DayPilot.SchedulerConfig = {
    // ...
    onEventMove: args => {
      let params: MoveEventParams = {
        id: args.e.id(),
        start: args.newStart.toString(),
        end: args.newEnd.toString(),
        resource: args.newResource
      };
      this.ds.moveEvent(params).subscribe(result => {
        this.scheduler.control.message("Event moved");
      });
    }
  };

  constructor(private ds: DataService) {}

  // ...

}
Angular Frontend: DataService
import {Injectable} from '@angular/core';
import {Observable} from 'rxjs';
import {DayPilot} from 'daypilot-pro-angular';
import {HttpClient} from "@angular/common/http";

@Injectable()
export class DataService {

  constructor(private http : HttpClient){
  }

  // ...

  moveEvent(data: EventMoveParams): Observable<EventData> {
    return this.http.post("/api/events/move", data) as Observable<any>;
  }

}

export interface EventMoveParams {
  id: string | number;
  start: string;
  end: string;
  resource: string | number;
}

export interface EventData {
  id: string | number;
  start: string;
  end: string;
  text: string;
  resource: string | number;
}
Spring Boot Backend: MainController.java
package org.daypilot.demo.angularscheduler.controller;

// ...

@RestController
public class MainController {

    @Autowired
    EventRepository er;

    @Autowired
    ResourceRepository rr;

    // ...

    @PostMapping("/api/events/move")
    @Transactional
    Event moveEvent(@RequestBody EventMoveParams params) {

    	Event e = er.findOne(params.id);
    	Resource r = rr.findOne(params.resource);

    	e.setStart(params.start);
    	e.setEnd(params.end);
    	e.setResource(r);

    	er.save(e);

    	return e;
    }

    public static class EventMoveParams {
      public Long id;
      public LocalDateTime start;
  	  public LocalDateTime end;
	    public Long resource;
    }

}
6. Delete Events using a Built-In Icon and Remove Them from the Database
![]()
The Angular Scheduler component includes built-in support for event deleting. It is disabled by default but we can enable it easily using eventDeleteHandling property:
config: DayPilot.SchedulerConfig = {
  eventDeleteHandling: "Update",
  // ...
}
When the deleting is enabled, the Scheduler will display a delete icon in the upper-right corner of the Scheduler events on hover.
In our Angular scheduling application, we will define a custom icon using an active area in the onBeforeEventRender event handler:
The onClick handler of the active area calls the server-side API endpoint using the deleteEvent() method of our DataService class. The event is then deleted from the Scheduler UI using the events.remove() method.
config: DayPilot.SchedulerConfig = {
  onBeforeEventRender: args => {
    args.data.areas = [
      {
        right: 5,
        top: 7,
        width: 24,
        height: 24,
        symbol: "/assets/daypilot.svg#x-circle",
        fontColor: "#777777",
        toolTip: "Delete",
        onClick: args => {
          const e = args.source;
          const params: EventDeleteParams = {
            id: e.id(),
          };
          this.ds.deleteEvent(params).subscribe(result => {
            this.scheduler.control.events.remove(e);
            this.scheduler.control.message("Event deleted");
          });
        }
      },
    ];
  },

  // ...

}
The server-side Spring Boot endpoint looks like this:
package org.daypilot.demo.angularscheduler.controller;

// ...

@RestController
public class MainController {

	@Autowired
	EventRepository er;

	@PostMapping("/api/events/delete")
	@Transactional
	void deleteEvent(@RequestBody EventDeleteParams params) {
    	  er.deleteById(params.id);
	}

  public static class EventDeleteParams {
    public Long id;
  }

  // ...
}
Serialize the Resource Reference as a Plain ID in JSON
We are using the original domain classes for JSON serialization so we need to flatten the structure - replace the Resource reference with a resource id.
Original (Resource.java):
@ManyToOne
Resource resource;
Updated (Resource.java):
@ManyToOne
@JsonIgnore
Resource resource;

@JsonProperty("resource")
public Long getResourceId() {
  return resource.getId();
}
History
November 14, 2023: Spring Boot 3.1.5 (Jakarta EE), Angular 17, DayPilot Pro 2023.4.5798.
December 16, 2020: Spring Boot upgraded to 2.4.1. DayPilot Pro upgraded to 2020.4.4807. Angular 11.
September 25, 2019: Spring Boot upgraded to 2.1.8. Running on JDK 11+. DayPilot Pro upgraded to 2019.3.4012. Angular 8. Event deleting added.
June 11, 2018: DayPilot Pro upgraded to version 2018.2.3297. Using Angular CLI 6.0 and Angular 6.
April 6, 2017: DayPilot Pro upgraded to version 8.3.2805. Using Angular CLI 1.0 and Angular 4.
February 22, 2017: DayPilot Pro upgraded to version 8.3.2721. All Scheduler-related code moved to SchedulerModule to allow easy Angular CLI upgrade.
November 21, 2016: Initial release, Angular 2
 DayPilot
