Overview
Since version 2021.3.5070, DayPilot Pro makes the pure JavaScript version available as a NPM package (
daypilot-pro-javascript). That will make it easier to use DayPilot Pro in NPM project. The Angular, React and Vue versions of the Scheduler component are already available as NPM packages.Learn how to create a new NPM project, add the DayPilot Pro package and setup WebPack.
You can download the NPM project with all the required boilerplate or you can generate your own project using the online DayPilot UI Builder application.
License
Licensed for testing and evaluation purposes. Please see the license agreement included in the sample project. You can use the source code of the tutorial if you are a licensed user of DayPilot Pro for JavaScript.
JavaScript Scheduler UI Builder
Instead of creating a new JavaScript Scheduler NPM project using the steps described below, you can also generate a new project using DayPilot UI Builder.
Configure the basic Scheduler properties (visible date range, timeline resolution, business hours, grid cell dimensions, event handling, …)
Live preview of the selected Scheduler configuration.
Generate and download a complete project (Angular, React and Vue targets are also available).
How to Create a New NPM Project?
Create a new directory for the project:
mkdir javascript-scheduler-npmEnter the directory:
cd javascript-scheduler-npmInitialize the NPM project using the default values:
npm init -yInstall WebPack and required plugins as dev dependencies:
npm install --save-dev copy-webpack-plugin terser-webpack-plugin webpack webpack-cli webpack-dev-serverInstall DayPilot Pro for JavaScript (you can get the latest version from npm.daypilot.org):
npm install https://npm.daypilot.org/daypilot-pro-javascript/trial/2021.3.5070.tar.gzHow to Adjust the "package.json" File?
Now add start and build scripts to package.json:
"scripts": {
  "start": "webpack-dev-server --mode development",
  "build": "webpack --mode production",
},
This will let you run the development server using npm run start command and compile the project using npm run build command.
Your package.json should look like this:
{
  "name": "javascript-scheduler-npm",
  "license": "SEE LICENSE IN license/LicenseAgreementTrial.pdf",
  "version": "1.0.0",
  "private": true,
  "scripts": {
    "start": "webpack-dev-server --mode development",
    "build": "webpack --mode production",
    "test": "echo \"Error: no test specified\" && exit 1"
  },
  "devDependencies": {
    "copy-webpack-plugin": "^9.0.1",
    "terser-webpack-plugin": "^5.2.0",
    "webpack": "^5.51.1",
    "webpack-cli": "^4.8.0",
    "webpack-dev-server": "^4.1.0"
  },
  "dependencies": {
    "daypilot-pro-javascript": "https://npm.daypilot.org/daypilot-pro-javascript/trial/2021.3.5070.tar.gz"
  }
}
How to Configure WebPack?
Create a new webpack.config.js file in the root of the project with the following content:
const path = require('path');
const TerserPlugin = require('terser-webpack-plugin');
const CopyPlugin = require('copy-webpack-plugin');

module.exports = {
  entry: {
    app: [path.join(__dirname, '/src/app.js')],
  },
  output: {
    filename: '[name].js',
    path: path.resolve(__dirname, 'dist'),
  },
  module: {
  },
  resolve: {
    extensions: [".js"]
  },
  optimization: {
    minimizer: [
      new TerserPlugin(),
    ],
  },
  performance: {
    maxEntrypointSize: 1000000,
    maxAssetSize: 1000000
  },
  plugins: [
    new CopyPlugin({
      patterns: [
        { from: "public", to: "./" },
      ],
    }),
  ]
};
This configuration file will configure the following WebPack actions:
Compile the project using
src/app.jsentry point (we will add this file in the next step).Create a compiled version of the JavaScript code in the
distfolder (app.js).Minimize the JavaScript code using Terser.
Copy files from the
publicdirectory to thedistfolder (index.html) usingCopyPlugin.
How to Add the Project Source Files?
To add the HTML root of the application, create the following index.html file in the public directory (you’ll need to create the directory manually):
<!DOCTYPE html>
<html>
<head>
  <meta charset="utf-8"/>
  <meta name="viewport" content="width=device-width, initial-scale=1">
  <title>JavaScript Scheduler NPM + WebPack Project</title>
</head>
<body>

<div id="dp"></div>
<script src="app.js"></script>

</body>
</html>
Note that the HTML body includes two important HTML tags:
The
<div id="dp"></div>tag is a placeholder for the JavaScript Scheduler component.The
<script src="app.js"></script>tag will include and execute the application JavaScript (we will create this file in the next step).
Now create the following app.js file in the src directory (you’ll need to create the directory manually):
import {DayPilot} from "daypilot-pro-javascript";
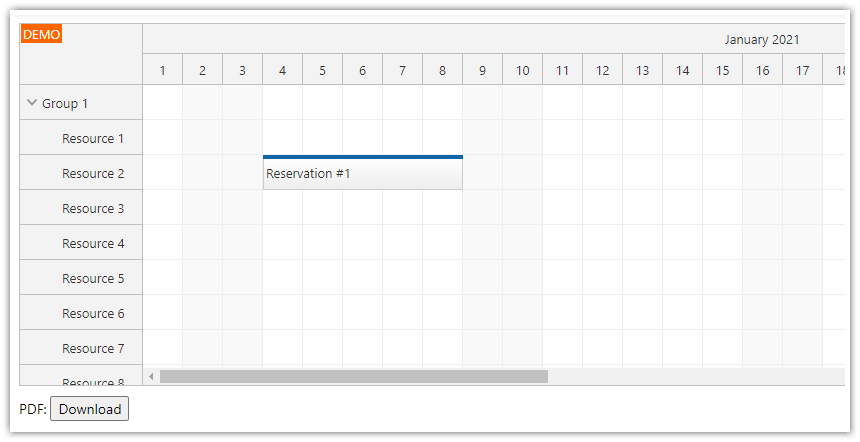
const dp = new DayPilot.Scheduler("dp", {
timeHeaders: [{"groupBy":"Month"},{"groupBy":"Day","format":"d"}],
scale: "Day",
days: DayPilot.Date.today().daysInMonth(),
startDate: DayPilot.Date.today().firstDayOfMonth(),
timeRangeSelectedHandling: "Enabled",
onTimeRangeSelected: async (args) => {
const dp = args.control;
const modal = await DayPilot.Modal.prompt("Create a new event:", "Event 1");
dp.clearSelection();
if (modal.canceled) { return; }
dp.events.add({
start: args.start,
end: args.end,
id: DayPilot.guid(),
resource: args.resource,
text: modal.result
});
},
eventMoveHandling: "Update",
onEventMoved: (args) => {
args.control.message("Event moved: " + args.e.text());
},
eventResizeHandling: "Update",
onEventResized: (args) => {
args.control.message("Event resized: " + args.e.text());
},
eventDeleteHandling: "Update",
onEventDeleted: (args) => {
args.control.message("Event deleted: " + args.e.text());
},
eventClickHandling: "Disabled",
treeEnabled: true,
});
dp.resources = [
{name: "Resource 1", id: "R1"},
{name: "Resource 2", id: "R2"},
{name: "Resource 3", id: "R3"},
{name: "Resource 4", id: "R4"},
{name: "Resource 5", id: "R5"},
{name: "Resource 6", id: "R6"},
{name: "Resource 7", id: "R7"},
{name: "Resource 8", id: "R8"},
{name: "Resource 9", id: "R9"},
];
dp.events.list = [];
dp.init();You can see that it imports the DayPilot namespace from the daypilot-pro-javascript package:
import {DayPilot} from "daypilot-pro-javascript";That makes the namespace available and you can start using it.
How to Run the NPM Project?
To test the application, run the project using the following command in the application root:
npm run startYour project will be available at http://localhost:8080/.
How to Compile the NPM Project for Deployment using WebPack?
To compile the project, run the following command in the application root:
npm run buildWebPack will compile the project and copy the required files to the build directory. To deploy the project, copy the content of the build directory to the web server.