Features
This tutorial shows how to create a simple monthly calendar application using ASP.NET Core and DayPilot Lite. It uses the monthly event calendar UI component from DayPilot Lite open-source library to display the monthly calendar. It loads data from the server using HTTP calls. The server-side API is created using ASP.NET Core Web API controller. It's a simple REST API that accepts and returns JSON messages. The data is stored in an SQL Server database (LocalDB). The application uses Entity Framework to create the data access layer.
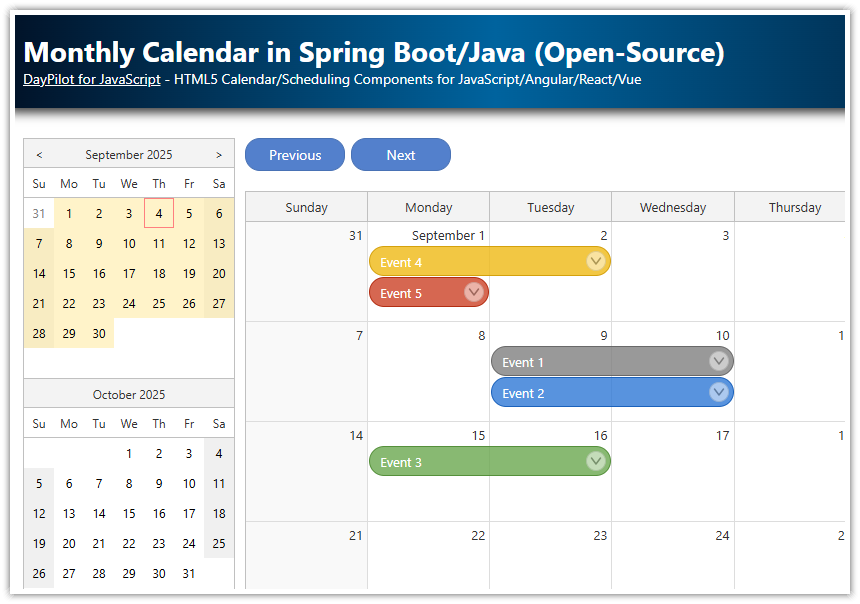
Monthly calendar with integrated date picker and previous/next buttons.
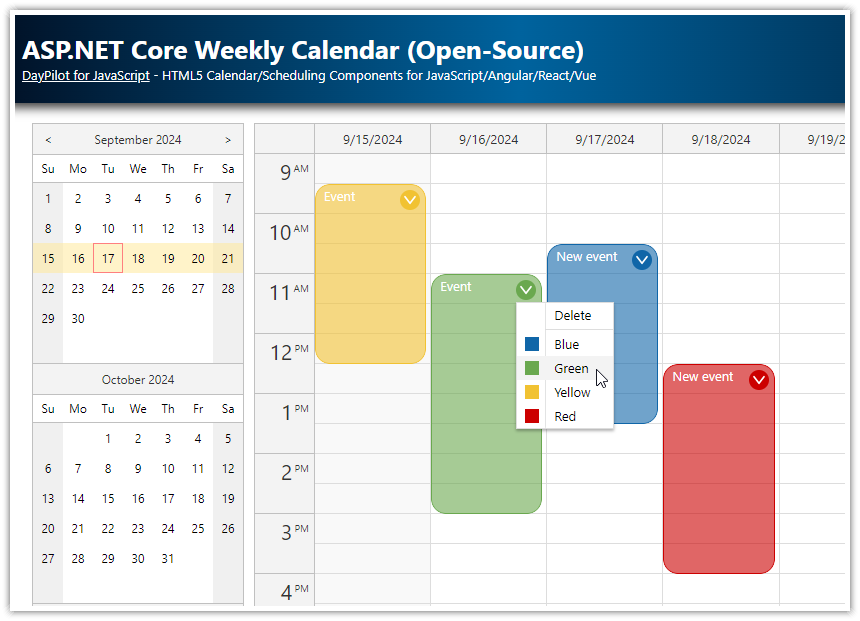
You can set custom event color using a context menu.
The calendar events can be created, moved and resized using drag and drop.
The application uses HTML5/JavaScript monthly event calendar component from the open-source DayPilot Lite for JavaScript package.
.NET 9
Entity Framework 9
SQL Server database
Visual Studio solution
To learn how to use the monthly calendar component to implement a maintenance scheduling application in ASP.NET Core, see the ASP.NET Core Maintenance Scheduling (Open-Source) tutorial.
How to initialize the ASP.NET Core monthly calendar component?

We will start with a simple HTML5 view that displays the monthly calendar in our ASP.NET Core scheduling application. It will not load any data at this moment.
Adding the monthly calendar to the view is very simple - you need to add a placeholder <div> element and two lines of JavaScript initialization code (Pages/Index.cshtml):
<script src="~/lib/daypilot/daypilot-all.min.js" asp-append-version="true"></script>

<div id="dp"></div>

<script>

    const calendar = new DayPilot.Month("dp");
    calendar.init();

</script>
The DayPilot library is loaded by including daypilot-all.min.js script in the ASP.NET Core page (Index.cshtml).
How to load calendar data using Entity Framework?

We want our ASP.NET Core web application to display event data from a database - so we need to create the backend API. We'll start with defining the data model.
There will be a simple class (CalendarEvent) that represents calendar event data. We will define it as follows (Models/Data.cs):
using Microsoft.EntityFrameworkCore;
using System;

namespace Project.Models
{
    public class CalendarDbContext : DbContext
    {
        public DbSet<CalendarEvent> Events { get; set; }

        public CalendarDbContext(DbContextOptions<CalendarDbContext> options):base(options) { }
    }

    public class CalendarEvent
    {
        public int Id { get; set; }
        public DateTime Start { get; set; }
        public DateTime End { get; set; }
        public string Text { get; set; }
        public string? Color { get; set; }
    }

}
The database will be created and initialized automatically when the application starts for the first time (Program.cs):
using (var serviceScope = app.Services.CreateScope())
{
    var services = serviceScope.ServiceProvider;
    try
    {
        var context = services.GetRequiredService<CalendarDbContext>();
        context.Database.EnsureCreated();
    }
    catch (Exception ex)
    {
        var logger = services.GetRequiredService<ILogger<Program>>();
        logger.LogError(ex, "An error occurred creating the DB.");
    }
}
The database connection string is defined in appsettings.json. It can be modified if needed:
{
    "Logging": {
        "IncludeScopes": false,
        "LogLevel": {
            "Default": "Warning"
        }
    },
    "ConnectionStrings": {
        "CalendarContext": "Server=(localdb)\\mssqllocaldb;Database=DayPilot.TutorialMonthlyCalendar;Trusted_Connection=True"
    }
}
ASP.NET Core Web API Controller

As soon as the database access code is ready (and a new database created) we can generate a new web API controller using a Visual Studio "New Controller" wizard.
The new web API controller can be found in Controllers/EventsController.cs file.
In the next steps, we will use it as a skeleton of the backend API - we will extend it with custom actions needed for specific operations (such as changing the event color).
How to display events using ASP.NET Core calendar?

After the monthly calendar initialization, the calendar data can be loaded using a simple DayPilot.Month.events.load() call:
HTML5 View (Index.cshtml)
<script>

    const calendar = new DayPilot.Month("dp", {
      // ... configuration
    });
    calendar.init();

    calendar.events.load("/api/events");

</script>
This method will request the data from our web API controller using an GET request. The request URL will be automatically extended with start and end query string parameters which will specify the first and last day of the current view.
We will modify the auto-generated GetEvents() method of the web API controller to read the query string parameters and limit the database query to only load events from the specified date range.
ASP.NET Core Web API Controller (EventsController.cs)
namespace Project.Controllers
{
    [Produces("application/json")]
    [Route("api/Events")]
    public class EventsController : Controller
    {

        // ...

        // GET: api/Events
        [HttpGet]
        public async Task<ActionResult<IEnumerable<CalendarEvent>>> GetEvents([FromQuery] DateTime start, [FromQuery] DateTime end)
        {
            return await _context.Events
                .Where(e => !((e.End <= start) || (e.Start >= end)))
                .ToListAsync();
        }

        // ...

    }

}
How to create a new calendar event in ASP.NET Core?

The monthly calendar component supports selecting a time range using drag and drop. This behavior is enabled by default. We just need to add a custom event handler that will create a new event.
The following code creates a new onTimeRangeSelected event handler that asks for a new event name using a simplified modal dialog created using DayPilot.Modal class.
As soon as the event name is confirmed by the user it calls the web API controller using an AJAX call. If the AJAX call is successful the new event is created using the returned event data (which now include an ID generated on the server side) and added to the calendar data source and displayed.
HTML5 View (Index.cshtml)
<script>

    const calendar = new DayPilot.Month("dp", {
        onTimeRangeSelected: async args => {
            const modal = await DayPilot.Modal.prompt("Create a new event:", "Event");

            calendar.clearSelection();
            if (modal.canceled) {
                return;
            }
            const params = {
                start: args.start,
                end: args.end,
                text: modal.result,
                resource: args.resource
            };
            const { data: result } = await DayPilot.Http.post("/api/events", params);
            calendar.events.add(result);
        },

        // ...

    });


    calendar.init();

</script>
ASP.NET Core Web API Controller (EventsController.cs)
using System;
using System.Collections.Generic;
using System.Linq;
using System.Threading.Tasks;
using Microsoft.AspNetCore.Http;
using Microsoft.AspNetCore.Mvc;
using Microsoft.EntityFrameworkCore;
using TutorialMonthlyCalendarAspNetCore.Models;

namespace TutorialMonthlyCalendarAspNetCore.Controllers
{
    [Produces("application/json")]
    [Route("api/Events")]
    public class EventsController : Controller
    {

        // ...

        // POST: api/Events
        [HttpPost]
        public async Task<IActionResult> PostEvent([FromBody] CalendarEvent @event)
        {
            if (!ModelState.IsValid)
            {
                return BadRequest(ModelState);
            }

            _context.Events.Add(@event);
            await _context.SaveChangesAsync();

            return CreatedAtAction("GetEvent", new { id = @event.Id }, @event);
        }

        // ...

    }

}
How to delete calendar events using a context menu?

In this example, we will use the calendar context menu to delete events.
The “Delete” menu item invokes a DELETE HTTP call to the ASP.NET Core API which removes the calendar event record from the database. When the HTTP call is complete, it removes the event from the calendar using the client-side API - events.remove() method.
HTML5 View (Index.cshtml)
<script>

    const calendar = new DayPilot.Month("dp", {
        onBeforeEventRender: args => {

            // ...

            args.data.areas = [
                {
                    top: 5,
                    right: 8,
                    width: 18,
                    height: 18,
                    symbol: "icons/daypilot.svg#minichevron-down-4",
                    fontColor: "#666",
                    visibility: "Hover",
                    action: "ContextMenu",
                    style: "background-color: #f9f9f9; border: 1px solid #666; cursor:pointer; border-radius: 15px;"
                }
            ];
        },
        contextMenu: new DayPilot.Menu({
            items: [
                {
                    text: "Delete",
                    onClick: async args => {
                        const e = args.source;
                        const id = e.id();
                        await DayPilot.Http.delete(`/api/events/${id}`);
                        calendar.events.remove(e);
                    }
                },

                // ...
            ]
        })
    });

    calendar.init();

</script>
The ASP.NET Core Web API Controller defines a DeleteEvent() method which handles the delete requests. It deletes the event using Remove() method provided by the Entity Framework.
EventsController.cs
namespace Project.Controllers
{
    [Produces("application/json")]
    [Route("api/Events")]
    public class EventsController : Controller
    {

        // ...

        // DELETE: api/Events/5
        [HttpDelete("{id}")]
        public async Task<IActionResult> DeleteEvent([FromRoute] int id)
        {
            if (!ModelState.IsValid)
            {
                return BadRequest(ModelState);
            }

            var @event = await _context.Events.SingleOrDefaultAsync(m => m.Id == id);
            if (@event == null)
            {
                return NotFound();
            }

            _context.Events.Remove(@event);
            await _context.SaveChangesAsync();

            return Ok(@event);
        }

        // ...

    }

}
How to move and resize calendar events using drag and drop?

The ASP.NET Core monthly calendar comes with the drag and drop support enabled. All you need to do is to add the event handlers that will process the operation.
The onEventMove event handler is fired after an event is moved using drag and drop. The target location is available in the args object as args.newStart and args.newEnd.
The event handler call the /api/events/{id}/move ASP.NET Core endpoint which saves the changes in the database. The change as applied automatically on the client side (the eventMoveHandling property is set to "Update" by default).
The onEventResize event handler fires when a user resizes an event. The logic is very similar so we can use the same code.
Index.cshtml
<script>

    const calendar = new DayPilot.Month("dp", {
        onEventMove: async args => {
            const params = {
                id: args.e.id(),
                start: args.newStart,
                end: args.newEnd
            };
            const id = args.e.id();
            await DayPilot.Http.put(`/api/events/${id}/move`, params);
        },
        onEventResize: async args => {
            const params = {
                id: args.e.id(),
                start: args.newStart,
                end: args.newEnd
            };
            const id = args.e.id();
            await DayPilot.Http.put(`/api/events/${id}/move`, params);
        },

        // ...

    });
    calendar.init();

</script>
On the server side, the API controller handles the HTTP requests and updates the calendar event start and end using Entity Framework.
EventsController.cs
using System;
using System.Collections.Generic;
using System.Linq;
using System.Threading.Tasks;
using Microsoft.AspNetCore.Http;
using Microsoft.AspNetCore.Mvc;
using Microsoft.EntityFrameworkCore;
using TutorialMonthlyCalendarAspNetCore.Models;

namespace Project.Controllers
{
    [Produces("application/json")]
    [Route("api/Events")]
    public class EventsController : Controller
    {

        // ...

        // PUT: api/Events/5/move
        [HttpPut("{id}/move")]
        public async Task<IActionResult> MoveEvent([FromRoute] int id, [FromBody] EventMoveParams param)
        {
            if (!ModelState.IsValid)
            {
                return BadRequest(ModelState);
            }

            var @event = await _context.Events.SingleOrDefaultAsync(m => m.Id == id);
            if (@event == null)
            {
                return NotFound();
            }

            @event.Start = param.Start;
            @event.End = param.End;

            try
            {
                await _context.SaveChangesAsync();
            }
            catch (DbUpdateConcurrencyException)
            {
                if (!EventExists(id))
                {
                    return NotFound();
                }
                else
                {
                    throw;
                }
            }

            return NoContent();
        }

        private bool EventExists(int id)
        {
            return _context.Events.Any(e => e.Id == id);
        }

        // ...

    }

    public class EventMoveParams
    {
        public DateTime Start { get; set; }
        public DateTime End { get; set; }
    }

    public class EventColorParams
    {
        public string Color { get; set; }
    }
}
How to change event color in ASP.NET Core calendar?

We will use the context menu to change the color of ASP.NET Core calendar events.
The context menu contains five new items: “Blue”, “Green”, “Yellow” and “Red” items that set the specified color, and “Auto” that resets the calendar event color to the default value.
The updateColor() JavaScript function calls the /api/events/${id}/color ASP.NET Core endpoint that updates the color in the database using Entity Framework. Then it changes the color using the client-side calendar API to make the change visible.
Here is the client-side source code of the color changing logic:
It adds the context menu to calendar events in the
onBeforeEventRenderevent handler.We also add an active area (
args.data.areas) with an icon as a hint that the context menu is available.The
contextMenuproperty defines the extended context menu with color-changing items.The
updateColor()function performs the change.
Index.cshtml
<script>

    const calendar = new DayPilot.Month("dp", {
        onBeforeEventRender: args => {

            const color = args.data.color;

            if (color) {
                args.data.backColor = DayPilot.ColorUtil.lighter(color);
                args.data.borderColor = "darker";
                args.data.barColor = color;
            }

            args.data.areas = [
                {
                    top: 5,
                    right: 8,
                    width: 18,
                    height: 18,
                    symbol: "icons/daypilot.svg#minichevron-down-4",
                    fontColor: "#666",
                    visibility: "Hover",
                    action: "ContextMenu",
                    style: "background-color: #f9f9f9; border: 1px solid #666; cursor:pointer; border-radius: 15px;"
                }
            ];
        },
        contextMenu: new DayPilot.Menu({
            items: [
                {
                    text: "Delete",
                    onClick: async args => {
                        const e = args.source;
                        const id = e.id();
                        await DayPilot.Http.delete(`/api/events/${id}`);
                        calendar.events.remove(e);
                    }
                },
                {
                    text: "-"
                },
                {
                    text: "Blue",
                    icon: "icon icon-blue",
                    color: "#3c78d8",
                    onClick: args => { app.updateColor(args.source, args.item.color); }
                },
                {
                    text: "Green",
                    icon: "icon icon-green",
                    color: "#6aa84f",
                    onClick: args => { app.updateColor(args.source, args.item.color); }
                },
                {
                    text: "Yellow",
                    icon: "icon icon-yellow",
                    color: "#f1c232",
                    onClick: args => { app.updateColor(args.source, args.item.color); }
                },
                {
                    text: "Red",
                    icon: "icon icon-red",
                    color: "#cc4125",
                    onClick: args => { app.updateColor(args.source, args.item.color); }
                },
                {
                    text: "Auto",
                    color: "",
                    onClick: args => { app.updateColor(args.source, args.item.color); }
                },
            ]
        }),

        // ...

    });
    calendar.init();


    const app = {
        async updateColor(e, color) {
            const params = {
                color: color
            };
            const id = e.id();
            await DayPilot.Http.put(`/api/events/${id}/color`, params);
            e.data.color = color;
            calendar.events.update(e);
        },

        // ...

    };

</script>
The server-side API controller includes SetEventColor() method that handles the api/Events/{id}/color endpoint. It uses the event id to load the record from database, updates the color, and saves the changes.
EventsController.cs
namespace Project.Controllers
{
    [Produces("application/json")]
    [Route("api/Events")]
    public class EventsController : Controller
    {

        // ...

        // PUT: api/Events/5/color
        [HttpPut("{id}/color")]
        public async Task<IActionResult> SetEventColor([FromRoute] int id, [FromBody] EventColorParams param)
        {
            if (!ModelState.IsValid)
            {
                return BadRequest(ModelState);
            }

            var @event = await _context.Events.SingleOrDefaultAsync(m => m.Id == id);
            if (@event == null)
            {
                return NotFound();
            }

            @event.Color = param.Color;

            try
            {
                await _context.SaveChangesAsync();
            }
            catch (DbUpdateConcurrencyException)
            {
                if (!EventExists(id))
                {
                    return NotFound();
                }
                else
                {
                    throw;
                }
            }

            return NoContent();
        }

        private bool EventExists(int id)
        {
            return _context.Events.Any(e => e.Id == id);
        }

        // ...

    }

}
Full Source Code of the Client
Here is the full source code of the client-side part of the application (Index.cshtml):
@page
@model IndexModel
@{
    ViewData["Title"] = "Home page";
}

<script src="~/lib/daypilot/daypilot-all.min.js" asp-append-version="true"></script>

<div class="main" style="display: flex;">
    <div style="">
        <div id="nav"></div>
    </div>
    <div style="flex-grow: 1; margin-left: 10px;">
        <div class="navi">
            <button id="previous">
                <svg xmlns="http://www.w3.org/2000/svg" width="12" height="12" viewBox="0 0 12 12">
                    <use href="icons/daypilot.svg#minichevron-left-2"></use>
                </svg>
            </button>
            <button id="today" class="highlighted">Today</button>
            <button id="next">
                <svg xmlns="http://www.w3.org/2000/svg" width="12" height="12" viewBox="0 0 12 12">
                    <use href="icons/daypilot.svg#minichevron-right-2"></use>
                </svg>
            </button>
        </div>
        <div id="dp"></div>
    </div>
</div>

<script>

    const datePicker = new DayPilot.Navigator("nav", {
        showMonths: 3,
        skipMonths: 3,
        selectMode: "Month",
        onTimeRangeSelected: args => {
            calendar.startDate = args.day;
            calendar.update();
            calendar.events.load("/api/events");
        }
    });
    datePicker.init();

    const calendar = new DayPilot.Month("dp", {
        eventHeight: 30,
        onTimeRangeSelected: async args => {
            const modal = await DayPilot.Modal.prompt("Create a new event:", "Event");

            calendar.clearSelection();
            if (modal.canceled) {
                return;
            }
            const params = {
                start: args.start,
                end: args.end,
                text: modal.result,
                resource: args.resource
            };
            const { data: result } = await DayPilot.Http.post("/api/events", params);
            calendar.events.add(result);
        },
        onEventMove: async args => {
            const params = {
                id: args.e.id(),
                start: args.newStart,
                end: args.newEnd
            };
            const id = args.e.id();
            await DayPilot.Http.put(`/api/events/${id}/move`, params);
        },
        onEventResize: async args => {
            const params = {
                id: args.e.id(),
                start: args.newStart,
                end: args.newEnd
            };
            const id = args.e.id();
            await DayPilot.Http.put(`/api/events/${id}/move`, params);
        },
        onBeforeEventRender: args => {

            const color = args.data.color;

            if (color) {
                args.data.backColor = DayPilot.ColorUtil.lighter(color);
                args.data.borderColor = "darker";
                args.data.barColor = color;
            }

            args.data.areas = [
                {
                    top: 5,
                    right: 8,
                    width: 18,
                    height: 18,
                    symbol: "icons/daypilot.svg#minichevron-down-4",
                    fontColor: "#666",
                    visibility: "Hover",
                    action: "ContextMenu",
                    style: "background-color: #f9f9f9; border: 1px solid #666; cursor:pointer; border-radius: 15px;"
                }
            ];
        },
        contextMenu: new DayPilot.Menu({
            items: [
                {
                    text: "Delete",
                    onClick: async args => {
                        const e = args.source;
                        const id = e.id();
                        await DayPilot.Http.delete(`/api/events/${id}`);
                        calendar.events.remove(e);
                    }
                },
                {
                    text: "-"
                },
                {
                    text: "Blue",
                    icon: "icon icon-blue",
                    color: "#3c78d8",
                    onClick: args => { app.updateColor(args.source, args.item.color); }
                },
                {
                    text: "Green",
                    icon: "icon icon-green",
                    color: "#6aa84f",
                    onClick: args => { app.updateColor(args.source, args.item.color); }
                },
                {
                    text: "Yellow",
                    icon: "icon icon-yellow",
                    color: "#f1c232",
                    onClick: args => { app.updateColor(args.source, args.item.color); }
                },
                {
                    text: "Red",
                    icon: "icon icon-red",
                    color: "#cc4125",
                    onClick: args => { app.updateColor(args.source, args.item.color); }
                },
                {
                    text: "Auto",
                    color: "",
                    onClick: args => { app.updateColor(args.source, args.item.color); }
                },
            ]
        })
    });
    calendar.init();


    const app = {
        elements: {
            previous: document.querySelector("#previous"),
            today: document.querySelector("#today"),
            next: document.querySelector("#next"),
        },
        async updateColor(e, color) {
            const params = {
                color: color
            };
            const id = e.id();
            await DayPilot.Http.put(`/api/events/${id}/color`, params);
            e.data.color = color;
            calendar.events.update(e);
        },
        init() {
            app.elements.previous.addEventListener("click", () => {
                datePicker.select(datePicker.selectionDay.addMonths(-1));
            });

            app.elements.today.addEventListener("click", () => {
                datePicker.select(DayPilot.Date.today());
            });

            app.elements.next.addEventListener("click", () => {
                datePicker.select(datePicker.selectionDay.addMonths(1));
            });

            calendar.events.load("/api/events");

        }
    };

    app.init();


</script>


<style>
    .month_default_event {
        overflow: hidden;
        border-radius: 15px;
    }
    .month_default_event_inner {
        background: #888888;
        border-color: #888888;
        color: #fff;
        padding-left: 35px;
        border-radius: 15px;
    }

    .month_default_event_bar {
        left: 0px;
        width: 30px;

    }
    .month_default_event_bar_inner {
        background: #636363;
        border-radius: 15px;
        width: 30px;
    }

    /* context menu icons */
    .icon:before {
        position: absolute;
        left: 0px;
        margin-left: 8px;
        margin-top: 3px;
        width: 14px;
        height: 14px;
        content: '';
    }

    .icon-blue:before { background-color: #3c78d8; }
    .icon-green:before { background-color: #6aa84f; }
    .icon-yellow:before {background-color: #f1c232;}
    .icon-red:before {background-color: #cc4125;}

</style> DayPilot


