Features
Implementation of custom snap-to-grid rules using
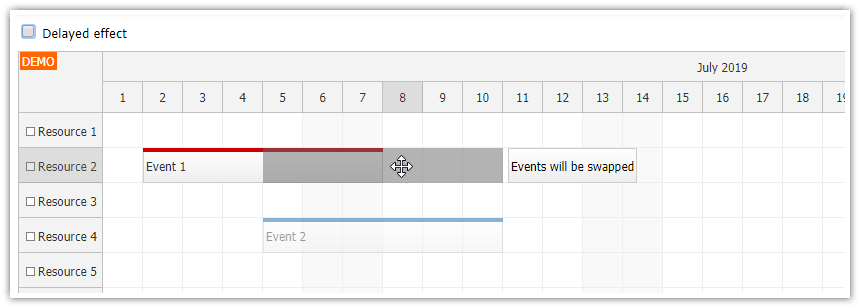
onTimeRangeSelecting,onEventMovingandonEventResizingevent handlers.The snap-to-grid matrix doesn't have to correspond to the Scheduler grid cells. This example uses one cell per hour and the snap-to-grid uses 5-minute steps.
License
Licensed for testing and evaluation purposes. Please see the license agreement included in the sample project. You can use the source code of the tutorial if you are a licensed user of DayPilot Pro for JavaScript.
Live Demo
JavaScript Scheduler Configuration
Let's start with the following JavaScript Scheduler component configuration:
<div id="dp"></div>

<script>
  const dp = new DayPilot.Scheduler("dp", {
    timeHeaders: [{groupBy: "Day"}, {groupBy: "Hour"}],
    scale: "Hour",
    snapToGrid: false,
    useEventBoxes: "Never",
    days: 7,
    startDate: DayPilot.Date.today().firstDayOfWeek(),
    // ...
  });
  dp.resources = [
    {name: "Resource 1", id: "R1"},
    {name: "Resource 2", id: "R2"},
    {name: "Resource 3", id: "R3"},
    {name: "Resource 4", id: "R4"},
    {name: "Resource 5", id: "R5"},
    {name: "Resource 6", id: "R6"},
    {name: "Resource 7", id: "R7"}
  ];
  dp.events.list = [];
  dp.init();

</script>
It's a simple setup that displays the current week (one cell per hour):
scale: "Hour",
days: 7,
startDate: DayPilot.Date.today().firstDayOfWeek(),
The time header displays the date in the first row and hours of day in the second row:
timeHeaders: [{groupBy: "Day"}, {groupBy: "Hour"}]The built-in snap-to-grid support is turned off (we will use our own implementation):
snapToGrid: falseThe event boxes (alignment of events with the grid cell) are turned off as well:
useEventBoxes: "Never"Snap-To-Grid for Event Creation

New events can be created using drag and drop time range selecting feature. We will use onTimeRangeSelecting real-time event handler to adjust the selection start and end during dragging (args.start, args.end).
We will also display the adjusted start and end time of the selection (args.left.html, args.right.html).
onTimeRangeSelecting: (args) => {
  const snapToMinutes = 5;
  const snapToMillis = snapToMinutes * 60 * 1000;
  const offsetStart = args.start.getTimePart() % snapToMillis;
  if (offsetStart) {
    args.start = args.start.addMilliseconds(-offsetStart);
  }

  const offsetEnd = args.end.getTimePart() % snapToMillis;
  if (offsetEnd) {
    args.end = args.end.addMilliseconds(-offsetEnd).addMilliseconds(snapToMillis);
  }

  // floor
  args.start = args.start.addSeconds(-args.start.getSeconds()).addMilliseconds(-args.start.getMilliseconds());
  args.end = args.end.addSeconds(-args.end.getSeconds()).addMilliseconds(-args.end.getMilliseconds());

  args.left.enabled = true;
  args.left.html = args.start.toString("h:mm tt");
  args.right.enabled = true;
  args.right.html = args.end.toString("h:mm tt");
},
As soon as the selection is complete (on mouse button release) the Scheduler fires the onTimeRangeSelected event which adds a new event to the data source:
onTimeRangeSelected: async (args) => {
  const modal = await DayPilot.Modal.prompt("Create a new event:", "Event 1");
  dp.clearSelection();
  if (modal.canceled) { return; }
  dp.events.add({
    start: args.start,
    end: args.end,
    id: DayPilot.guid(),
    resource: args.resource,
    text: modal.result
  });
},
Snap-To-Grid for Event Moving

The next step will be customization of the drag and drop event moving. This can be done using onEventMoving event handler.
The logic is the same here, we adjust the start and end times and display indicators with the time information:
onEventMoving: (args) => {
  const snapToMinutes = 5;
  const snapToMillis = snapToMinutes * 60 * 1000;
  const offset = args.start.getTimePart() % snapToMillis;
  if (offset) {
    args.start = args.start.addMilliseconds(-offset);
    args.end = args.end.addMilliseconds(-offset);
  }

  args.left.enabled = true;
  args.left.html = args.start.toString("h:mm tt");
  args.right.enabled = true;
  args.right.html = args.end.toString("h:mm tt");
}
Snap-To-Grid for Event Resizing

We also need to adjust the event resizing behavior. The onEventResizing event handler will update the start and end (depending on how the event is resized) and display the new time:
onEventResizing: (args) => {
  const snapToMinutes = 5;
  const snapToMillis = snapToMinutes * 60 * 1000;
  if (args.start !== args.e.start()) {
    const offsetStart = args.start.getTimePart() % snapToMillis;
    if (offsetStart) {
      args.start = args.start.addMilliseconds(-offsetStart);
    }
  }
  else if (args.end !== args.e.end()) {
    const offsetEnd = args.end.getTimePart() % snapToMillis;
    if (offsetEnd) {
      args.end = args.end.addMilliseconds(-offsetEnd).addMilliseconds(snapToMillis);
    }
  }
  args.left.enabled = true;
  args.left.html = args.start.toString("h:mm tt");
  args.right.enabled = true;
  args.right.html = args.end.toString("h:mm tt");
} DayPilot


