Overview
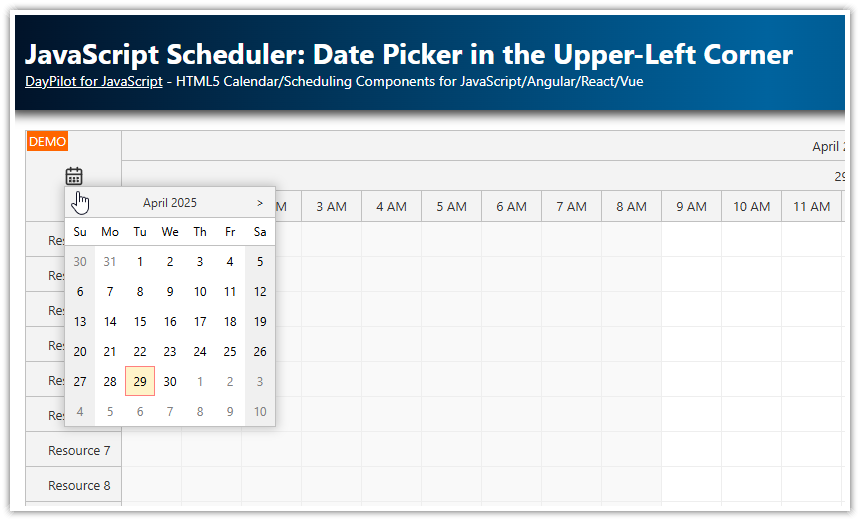
Learn how to link the JavaScript Scheduler component (from DayPilot Pro for JavaScript) to a date picker that will let users change the visible date.
When switching a date, it is possible to scroll to a specified time of day.
Evaluate the possible strategies for loading events during the date change
License
Licensed for testing and evaluation purposes. Please see the license agreement included in the sample project. You can use the source code of the tutorial if you are a licensed user of DayPilot Pro for JavaScript.
How to add a date picker to the web page?

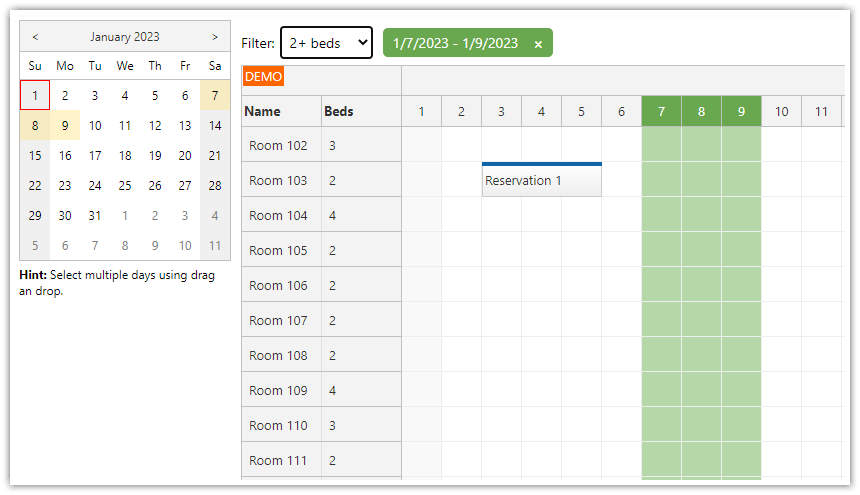
You can add the date picker to your web page using DayPilot Navigator component. The Navigator displays a small monthly calendar that lets users select a date using a click. It can display one or more months at once.
In order to display the date picker, it’s necessary to add a placeholder div to the HTML and initialize the date picker using JavaScript:
<script src="daypilot-all.min.js"></script>

<div id="datepicker"></div>

<script>
  const datepicker = new DayPilot.Navigator("datepicker");
  datepicker.init();
</script>
By default, the date picker will display one month (you can change it to display more months, either vertically or horizontally).
How to link the date picker to the JavaScript Scheduler component?

If you want to use the date picker to change the date visible in the JavaScript scheduler component, you need to handle onTimeRangeSelected event of the Navigator component. In the event handler, use the selected date (args.day) to set the startDate property of the Scheduler and update it:
const datepicker = new DayPilot.Navigator("datepicker", {
  onTimeRangeSelected: args => {

    scheduler.update({
      startDate: args.day,
    });

  }
});
datepicker.init();

const scheduler = new DayPilot.Scheduler("scheduler", {
  timeHeaders: [{groupBy:"Day", format: "MMMM d, yyyy"},{groupBy:"Hour"}, {groupBy: "Cell"}],
  scale: "CellDuration",
  cellDuration: 15,
  days: 1,
  // ...
});
scheduler.init();
How to scroll to a specific time of day when changing the date?

If you want to scroll to the first business hour of the new date you can add scrollTo property to the list of updated Scheduler properties.
In this example, the Scheduler will scroll to 9 am of the selected day.
const datepicker = new DayPilot.Navigator("datepicker", {
  onTimeRangeSelected: args => {

    scheduler.update({
      startDate: args.day,
      scrollTo: args.day.addHours(9)
    });

  }
});
datepicker.init();
How to load scheduler events when switching a date?

After switch the Scheduler date, you will also need to load the events for the new date range. There are two possible approaches:
1. Request the new event set and wait for the HTTP response. When the event data are available, update the Scheduler component just once.
const datepicker = new DayPilot.Navigator("datepicker", {
  onTimeRangeSelected: args => {
    datepickerApp.schedulerLoadAndSwitch(args.day);
  }
});


const datepickerApp = {
  async schedulerLoadAndSwitch(day) {
    const start = day;
    const end = day.addDays(1);
    const {data} = await DayPilot.Http.get(`/events?start=${start}&end=${end}`);
    scheduler.update({
      startDate: day,
      scrollTo: day.addHours(9),
      events: data
    });

  },

  // ...

};
2. Update the Scheduler component as quickly as possible and load the events after that. This means the Scheduler will be updated twice. It may seem inefficient but it will result in better user experience as the effect of the date picker click is visible immediately.
const datepicker = new DayPilot.Navigator("datepicker", {
  onTimeRangeSelected: args => {
    datepickerApp.schedulerSwitchAndLoad(args.day);
  }
});


const datepickerApp = {

  async schedulerSwitchAndLoad(day) {
    scheduler.update({
      startDate: day,
      scrollTo: day.addHours(9),
    });

    const start = scheduler.visibleStart();
    const end = scheduler.visibleEnd();
    const {data} = await DayPilot.Http.get(`/events?start=${start}&end=${end}`);
    scheduler.update({
      events: data
    });

  }

  // ...

};