Overview
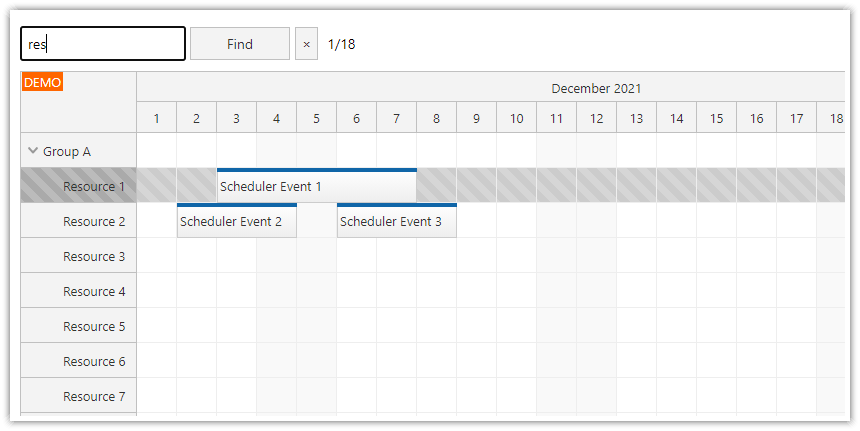
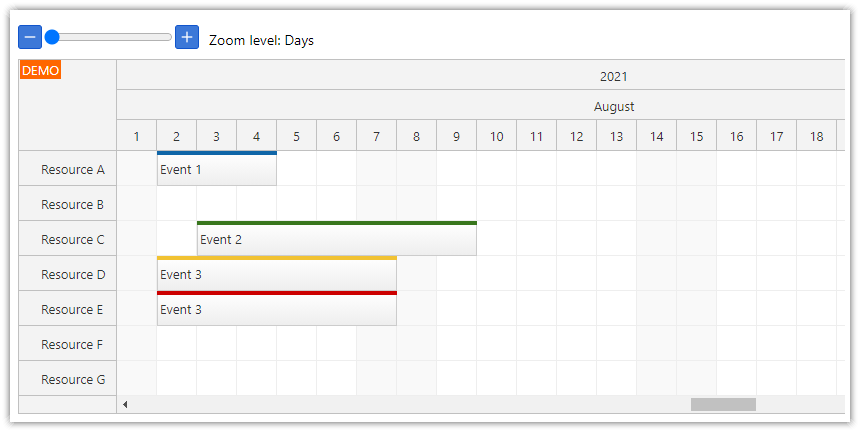
Search events displayed by the React Scheduler component from DayPilot Pro for JavaScript.
Highlight the matching text in all Scheduler events.
Focus the event at the current position.
“Next” and “Previous” buttons let you move the position to the next/previous matching event.
This tutorial keeps all events visible and highlights the matching text. It is also possible to filter events and hide ones that don’t match the specified rule.
License
Licensed for testing and evaluation purposes. Please see the license agreement included in the sample project. You can use the source code of the tutorial if you are a licensed user of DayPilot Pro for JavaScript.
How to Create the React Scheduler Component?

First, we create a simple React component that displays the Scheduler (Scheduler.js).
It displays the scheduler grid using DayPilot React Scheduler component (
<DayPilotScheduler>).The configuration of the Scheduler is stored in the state (
this.state.config).It loads the data (resources and events) in
componentDidMount()method using theupdate()method of the Scheduler.
The following code listing shows the structure of the Scheduler component (some data and configuration options are omitted to keep it short).
To learn more about the using React Scheduler component from DayPilot Pro in your React application, please see the React Scheduler Component Tutorial.
import React, {Component} from 'react';
import {DayPilot, DayPilotScheduler} from "daypilot-pro-react";

export class Scheduler extends Component {

  constructor(props) {
    super(props);

    this.state = {
      config:     {
        timeHeaders: [{groupBy: "Month"},{groupBy: "Day", format: "d"}],
        scale: "Day",
        days: 90,
        startDate: "2021-11-01",
        // ...
      }
    };
  }

  componentDidMount() {

    const resources = [
      {name: "Resource A", id: "A"},
      // ...
    ];

    const events = [
      { id: 1, text: "Event 1", start: "2021-11-02T00:00:00", end: "2021-11-05T00:00:00", resource: "A"},
      // ...
    ];

    this.scheduler.update({
      events,
      resources
    });

  }

  render() {
    return (
      <div>
        <DayPilotScheduler
          {...this.state.config}
          ref={component => this.scheduler = component && component.control}
        />
      </div>
    );
  }
}
How to Add the Search Functionality to the Scheduler?
Now we can start building the search functionality.
The search logic is wrapped in a special component (Search.js) so the content can be dynamically updated without refreshing the whole Scheduler.
<div>
  <Search scheduler={() => this.scheduler} ref={component => this.search = component} />
  <DayPilotScheduler
    {...this.state.config}
    ref={component => this.scheduler = component && component.control}
  />
</div>
The Search component (Search.js) displays four elements:
input box for the search phrase
label with the current position in the result set
next button
previous button
render() {
  return (
    <div style={{display: "flex", alignItems: "center"}}>

      Search:

      <input onChange={ev => this.search(ev)} />

      {this.info}

      <button title={"Previous"} onClick={ev => this.previous()} style={{display: this.displayStyle}} className={"next-previous"}>
        <svg width={18} height={18}><use href={"icons/daypilot.svg#minichevron-up-2"}/></svg>
      </button>

      <button title={"Next"} onClick={ev => this.next()} style={{display: this.displayStyle}} className={"next-previous"}>
        <svg width={18} height={18}><use href={"icons/daypilot.svg#minichevron-down-2"}/></svg>
      </button>

    </div>
  );
}
Note that we pass the React Scheduler component instance to our search component using scheduler property. The React Scheduler API provides methods that will help us with the implementation:
events.findAll() method searches the scheduler event data and returns an array of events that match the condition
onBeforeCellRender event lets us highlight the matching events and the current position in the results
<Search scheduler={() => this.scheduler} ... />How to Implement the Search Logic?
The inner state of our search React component contains three variables:
the search phrase (
phrase)a list of events that match the search phrase (
events)the current position in the list of result (
position)
Storing the search results and the current position lets us display the current position next to the input box (“1/4”) and implement the “Next” and “Previous” buttons that will let users skip between matching events.
constructor(props) {
  super(props);

  this.state = {
    position: 0,
    events: [],
    phrase: null
  };

}
You can see that we add a handler of the change event to the input box. This event is fired whenever the text box content changes.
<input onChange={ev => this.search(ev)} />The search() method uses the search phrase (ev.target.value) to find matching events.
search(ev) {
  const phrase = ev.target.value;
  const events = this.scheduler.events.findAll(e => {
    return e.data.text.toLowerCase().includes(phrase.toLowerCase());
  });
  const position = 0;

  const e = events[position];

  this.setState({
    phrase,
    events,
    position
  }, () => {
    const events = this.scheduler.events.list;
    this.scheduler.update({events});

    this.scheduler.events.scrollIntoView(e);
  });

}
After updating the state (we store the new phrase, events, and position values there), we request an update of the Scheduler component that will highlight the new phrase.
We use an optimized update which we invoke using the direct API (update() method with a single events property in the options object). The list of events remain the same, we just read the current value (this.scheduler.events.list). This will force the Scheduler to re-render the events only.
When updating the events, the Scheduler calls the onBeforeEventRender event handler for each of them:
We update the event HTML (
args.data.html) and highlight the search phrase in all events that contain it.We add a
.focusedCSS class to the event at the current position (args.data.cssClass).
Here is our onBeforeEventRender implementation (you can find it in Scheduler.js):
config:     {
  onBeforeEventRender: (args) => {
    if (!this.search.phrase) {
      return;
    }

    args.data.html = this.replaceAll(args.data.text, this.search.phrase, "<span style='background-color: #ffa500; color: #fff;'>$&</span>");

    const focused = this.search.events[this.search.position];
    if (focused && focused.data.id === args.data.id) {
      args.data.cssClass = "focused";
    }
  },

  // ...

}

replaceAll(source, search, replace) {
  const esc = search.replace(/[-/\\^$*+?.()|[\]{}]/g, '\\$&');
  const reg = new RegExp(esc, 'ig');
  return source.replace(reg, replace);
};
How to Add “Next” and “Previous” Buttons?

The “Next” button skips to the next matching event.
<button title={"Next"} onClick={ev => this.next()} style={{display: this.displayStyle}} className={"next-previous"}>
  <svg width={18} height={18}><use href={"icons/daypilot.svg#minichevron-down-2"}/></svg>
</button>
The button is only displayed if the results include at least one event. Otherwise, it is hidden using CSS:
get displayStyle() {
  const hasResults = this.state.events.length > 0;
  return hasResults ? "" : "none";
}
The onClick event handler calls the next() method which advances the current position in the result set. If we are already at the last position, it skips to the first result (position = 0).
After updating the position, it refreshes the Scheduler component using the update() method.
We also make sure that the focused event is visible using the events.scrollIntoView() method.
next() {

  let position = this.state.position + 1;
  if (position > this.state.events.length - 1) {
    position = 0;
  }

  const e = this.state.events[position];

  this.setState({
    position
  }, () => {
    this.scheduler.update({events: this.scheduler.events.list});
    this.scheduler.events.scrollIntoView(e);
  });

}
The implementation of the “Previous” button is very similar:
<button title={"Previous"} onClick={ev => this.previous()} style={{display: this.displayStyle}} className={"next-previous"}>
  <svg width={18} height={18}><use href={"icons/daypilot.svg#minichevron-up-2"}/></svg>
</button>
In the previous() method, we need to check the position and skip to the last one when we hit the start.
previous() {

  let position = this.state.position - 1;
  if (position < 0) {
    position = this.state.events.length - 1;
  }

  const e = this.state.events[position];

  this.setState({
    position
  }, () => {
    this.scheduler.update({events: this.scheduler.events.list});
    this.scheduler.events.scrollIntoView(e);
  });

}